
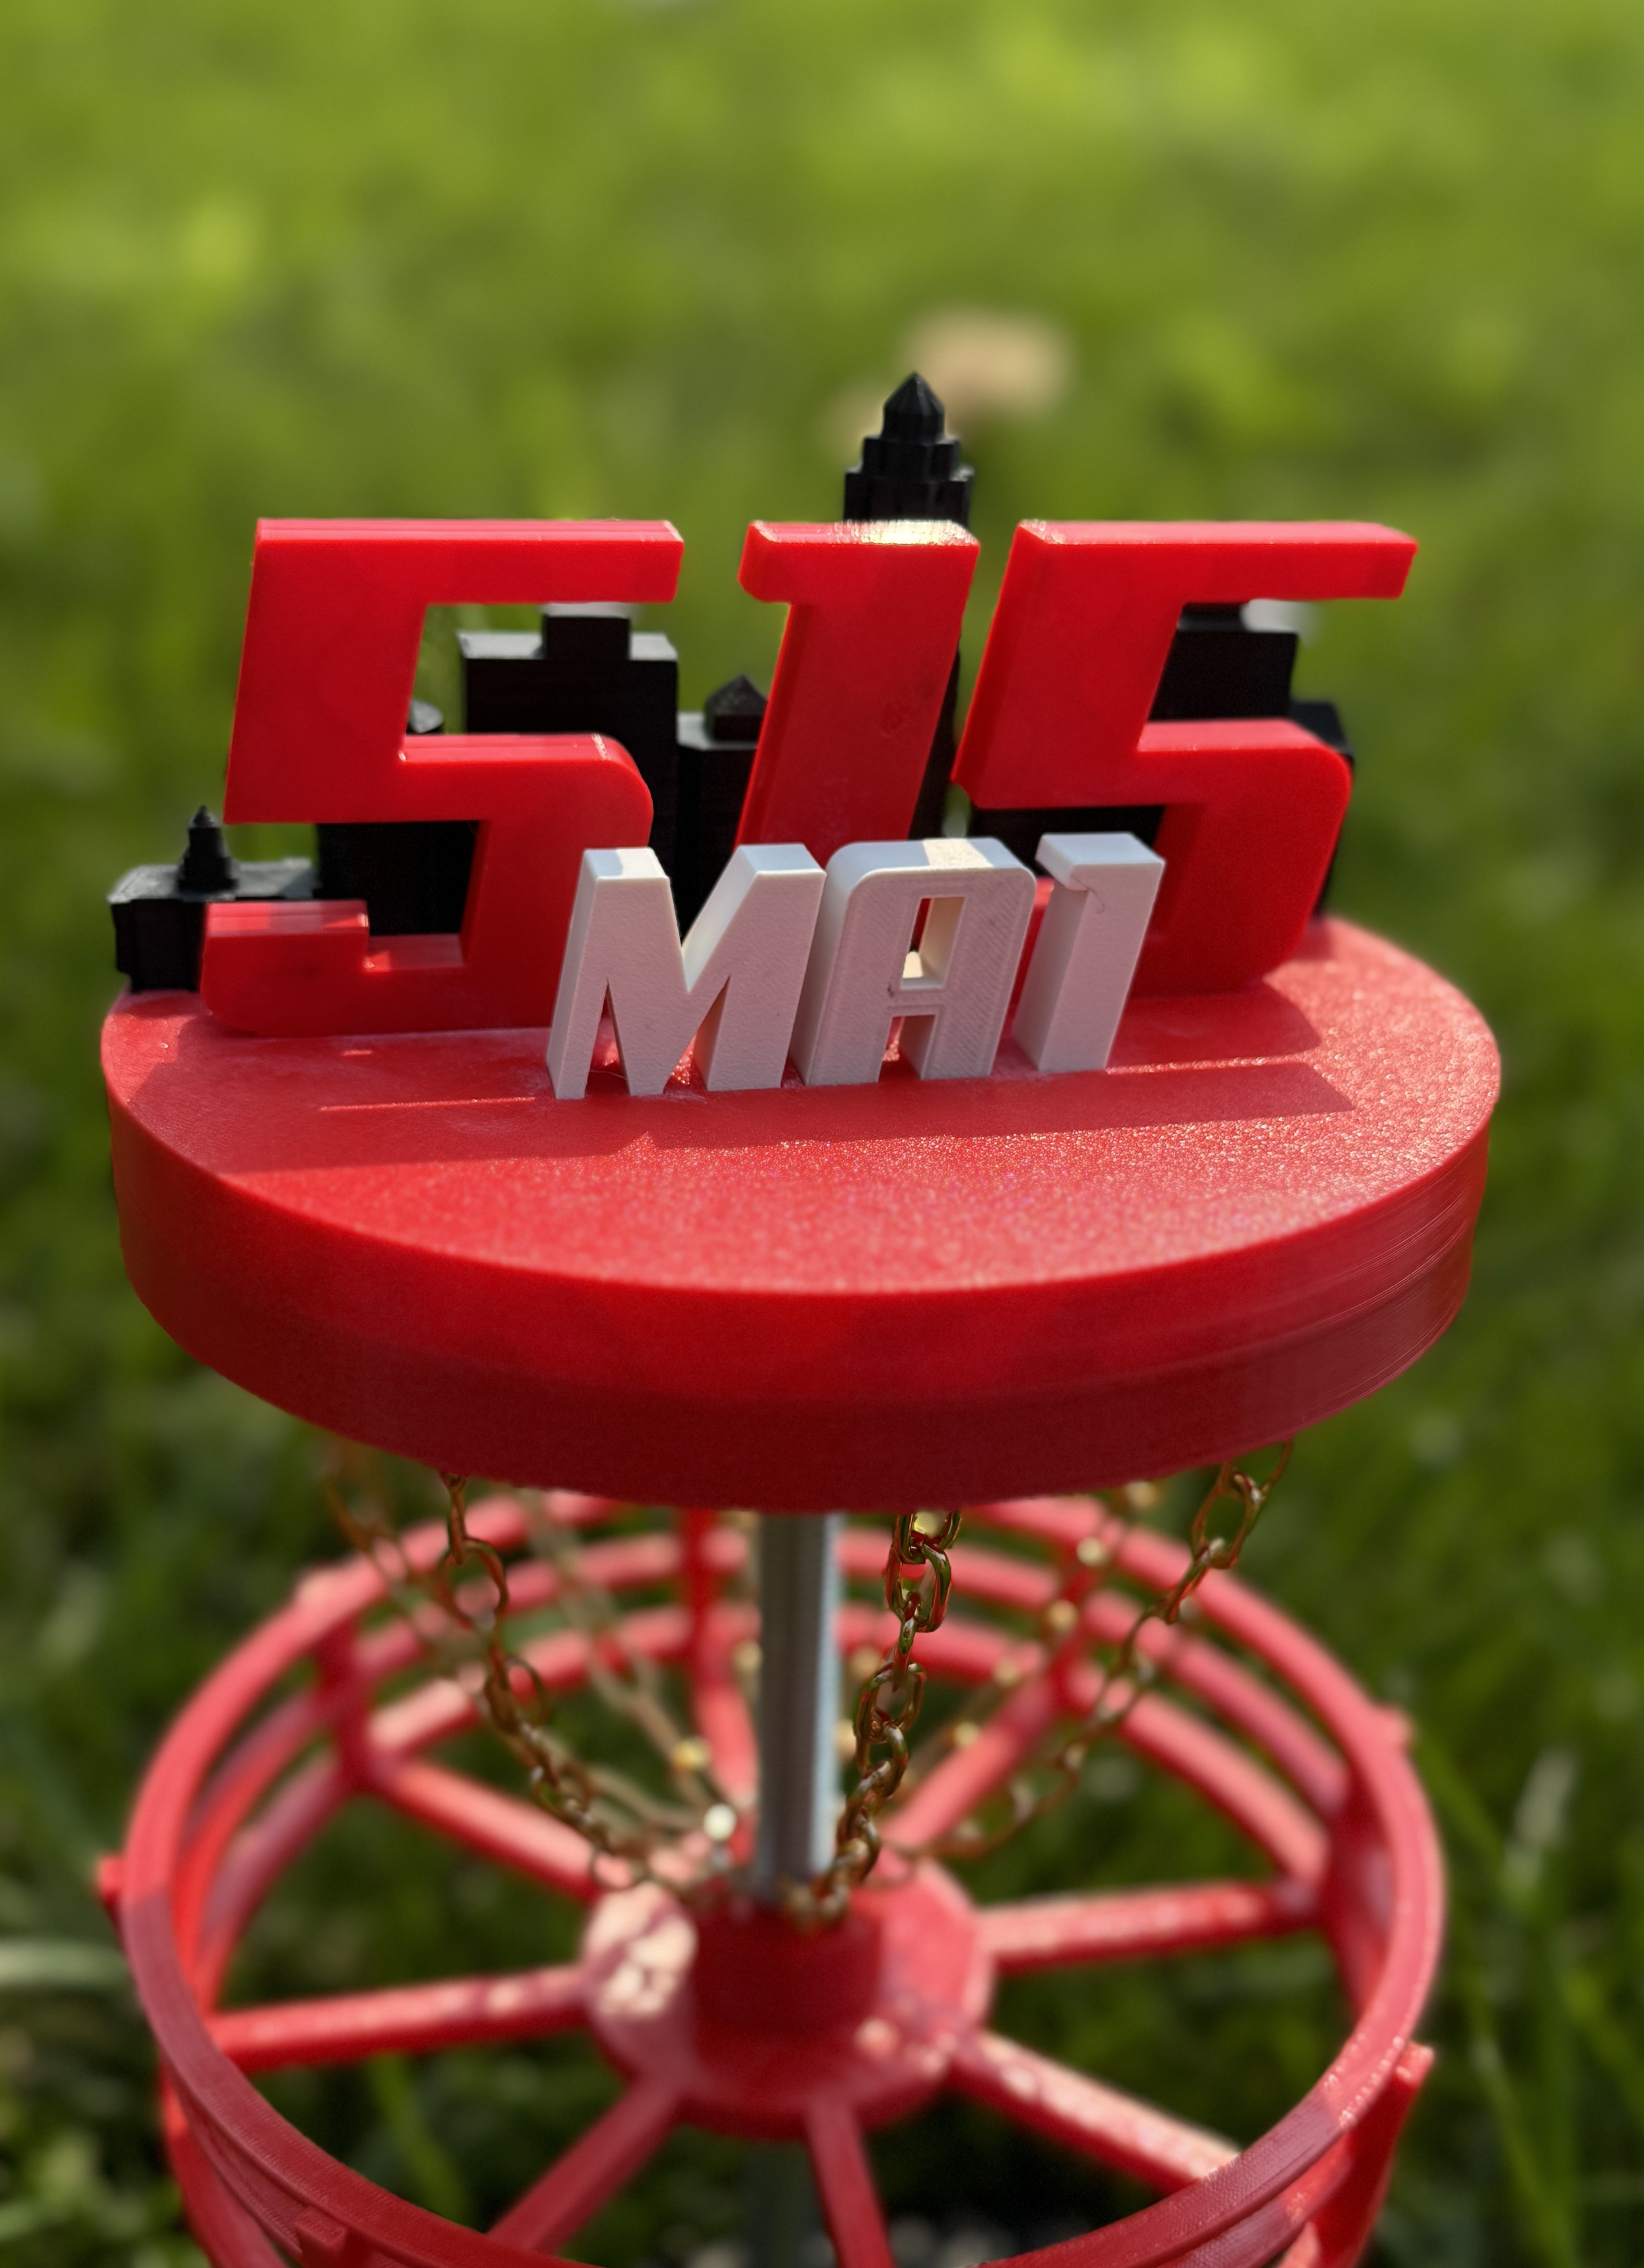
Full Lineup
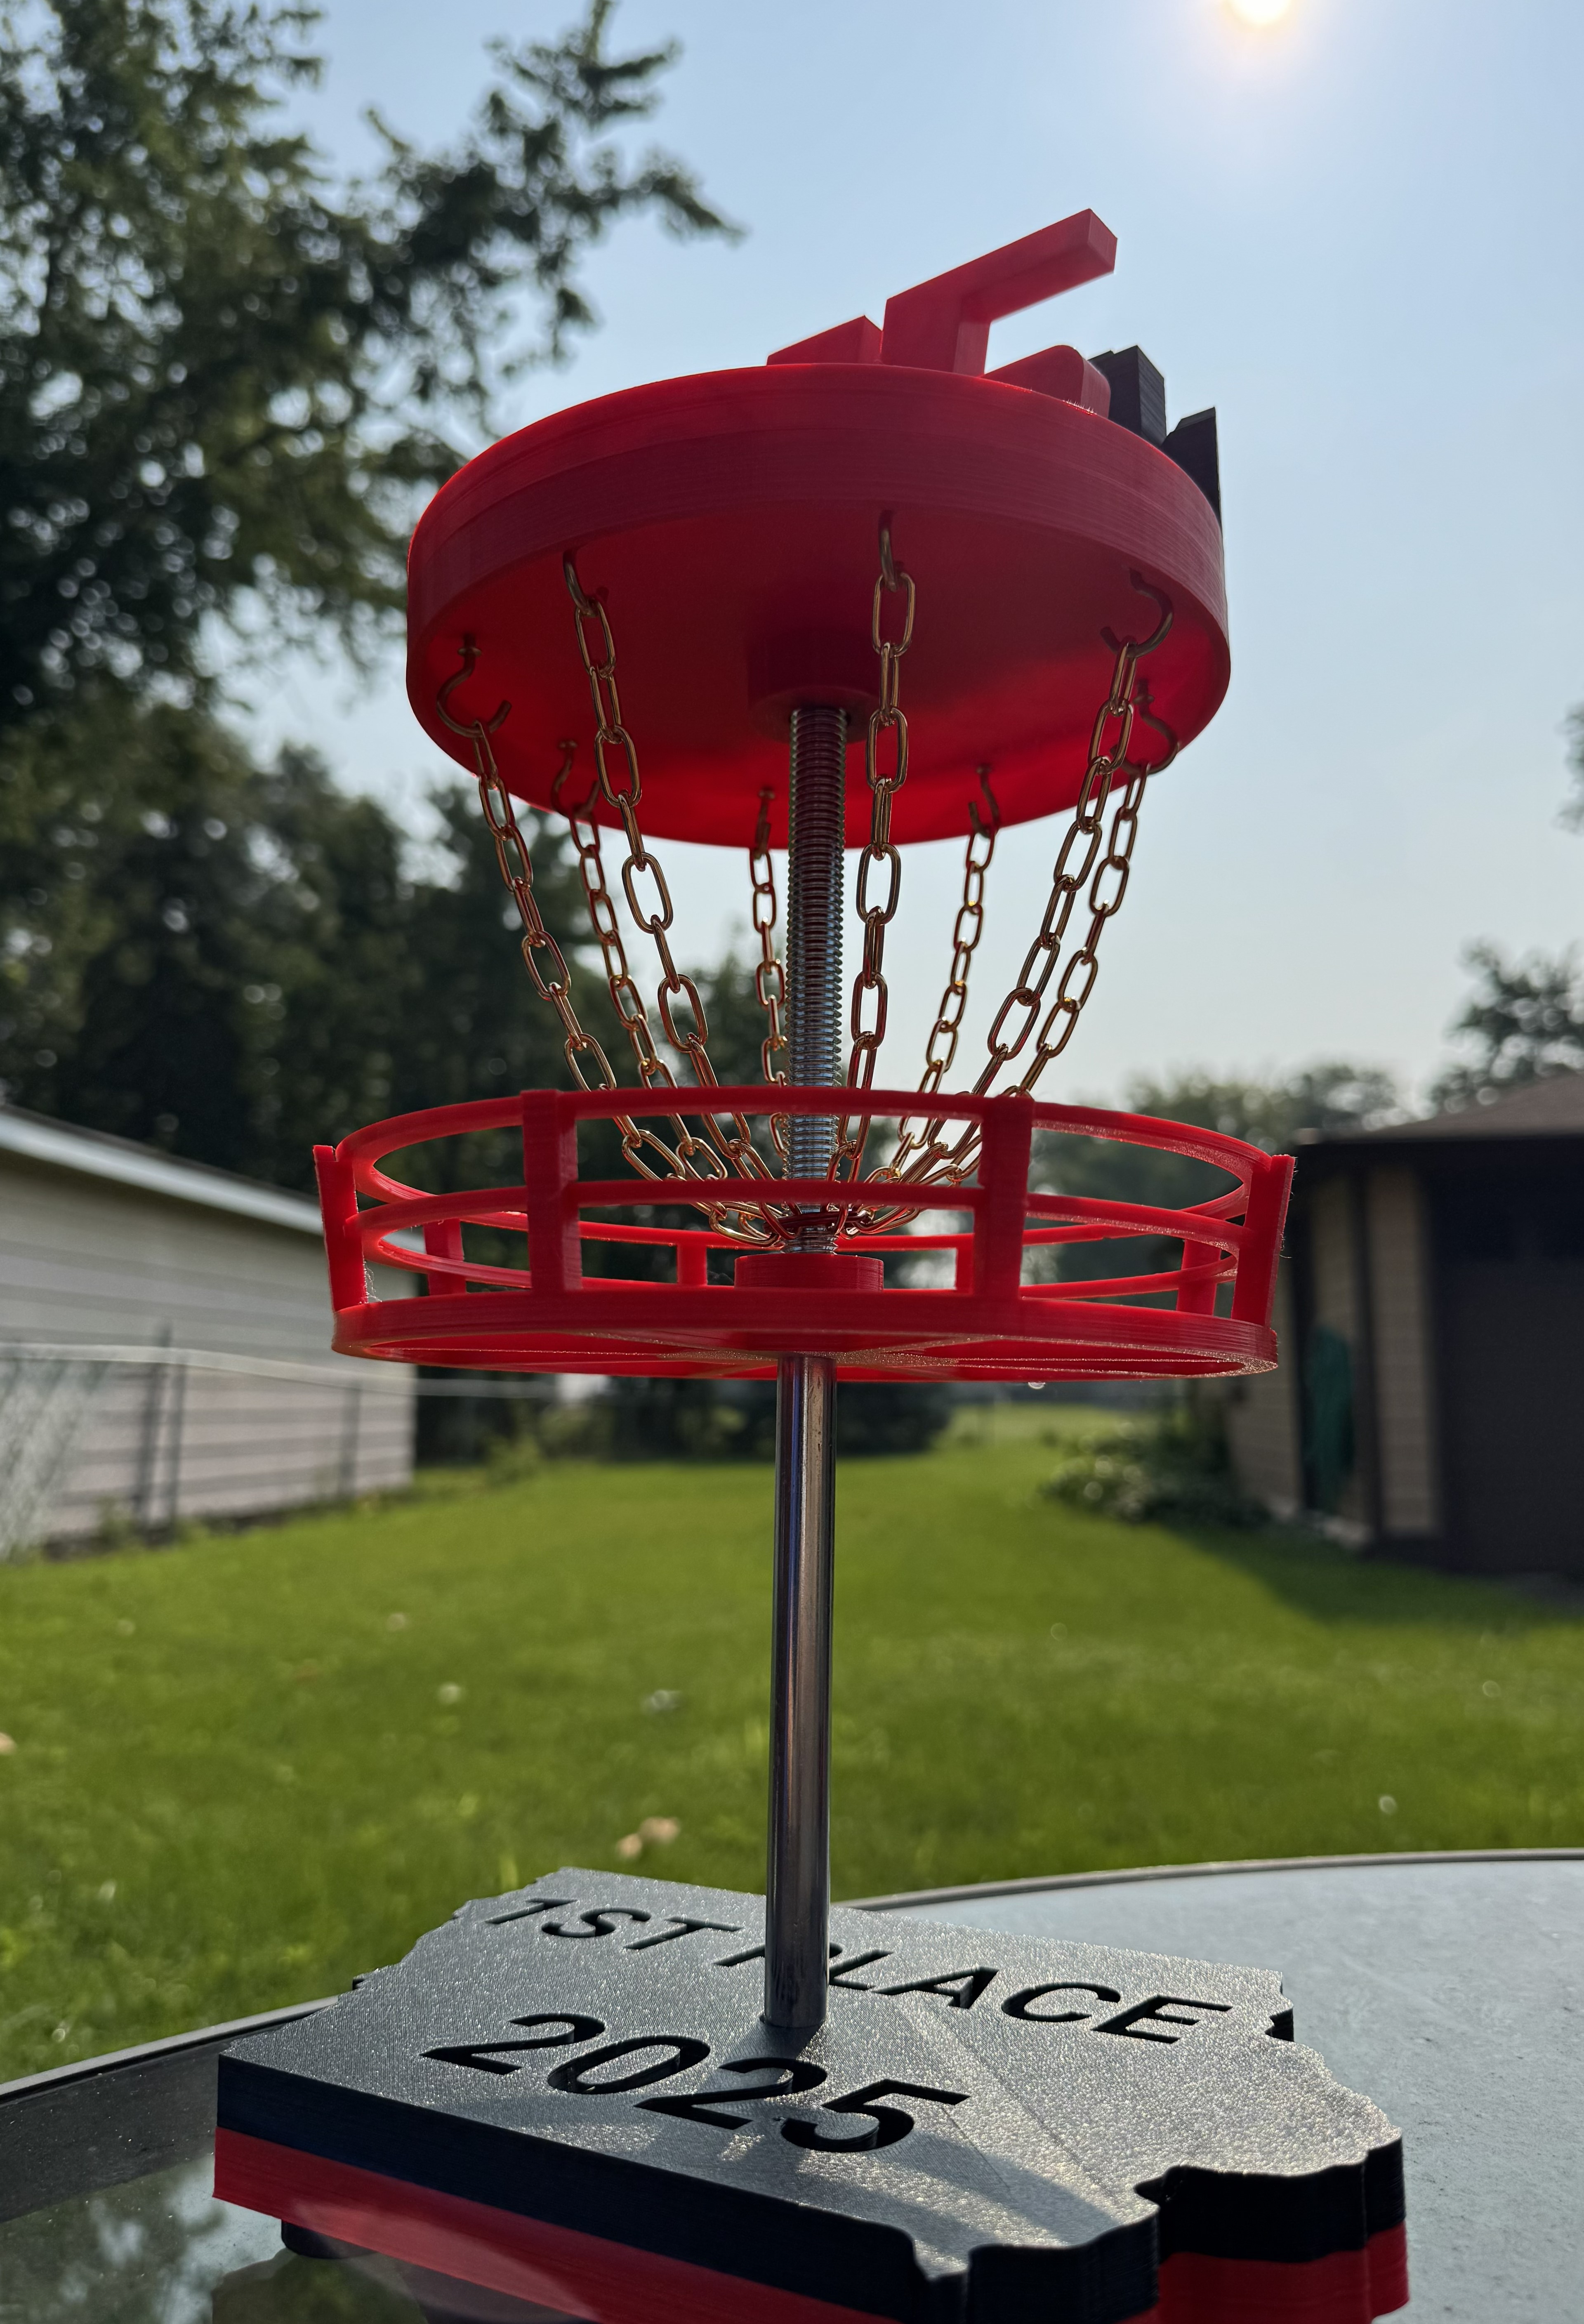
All four trophies in a row
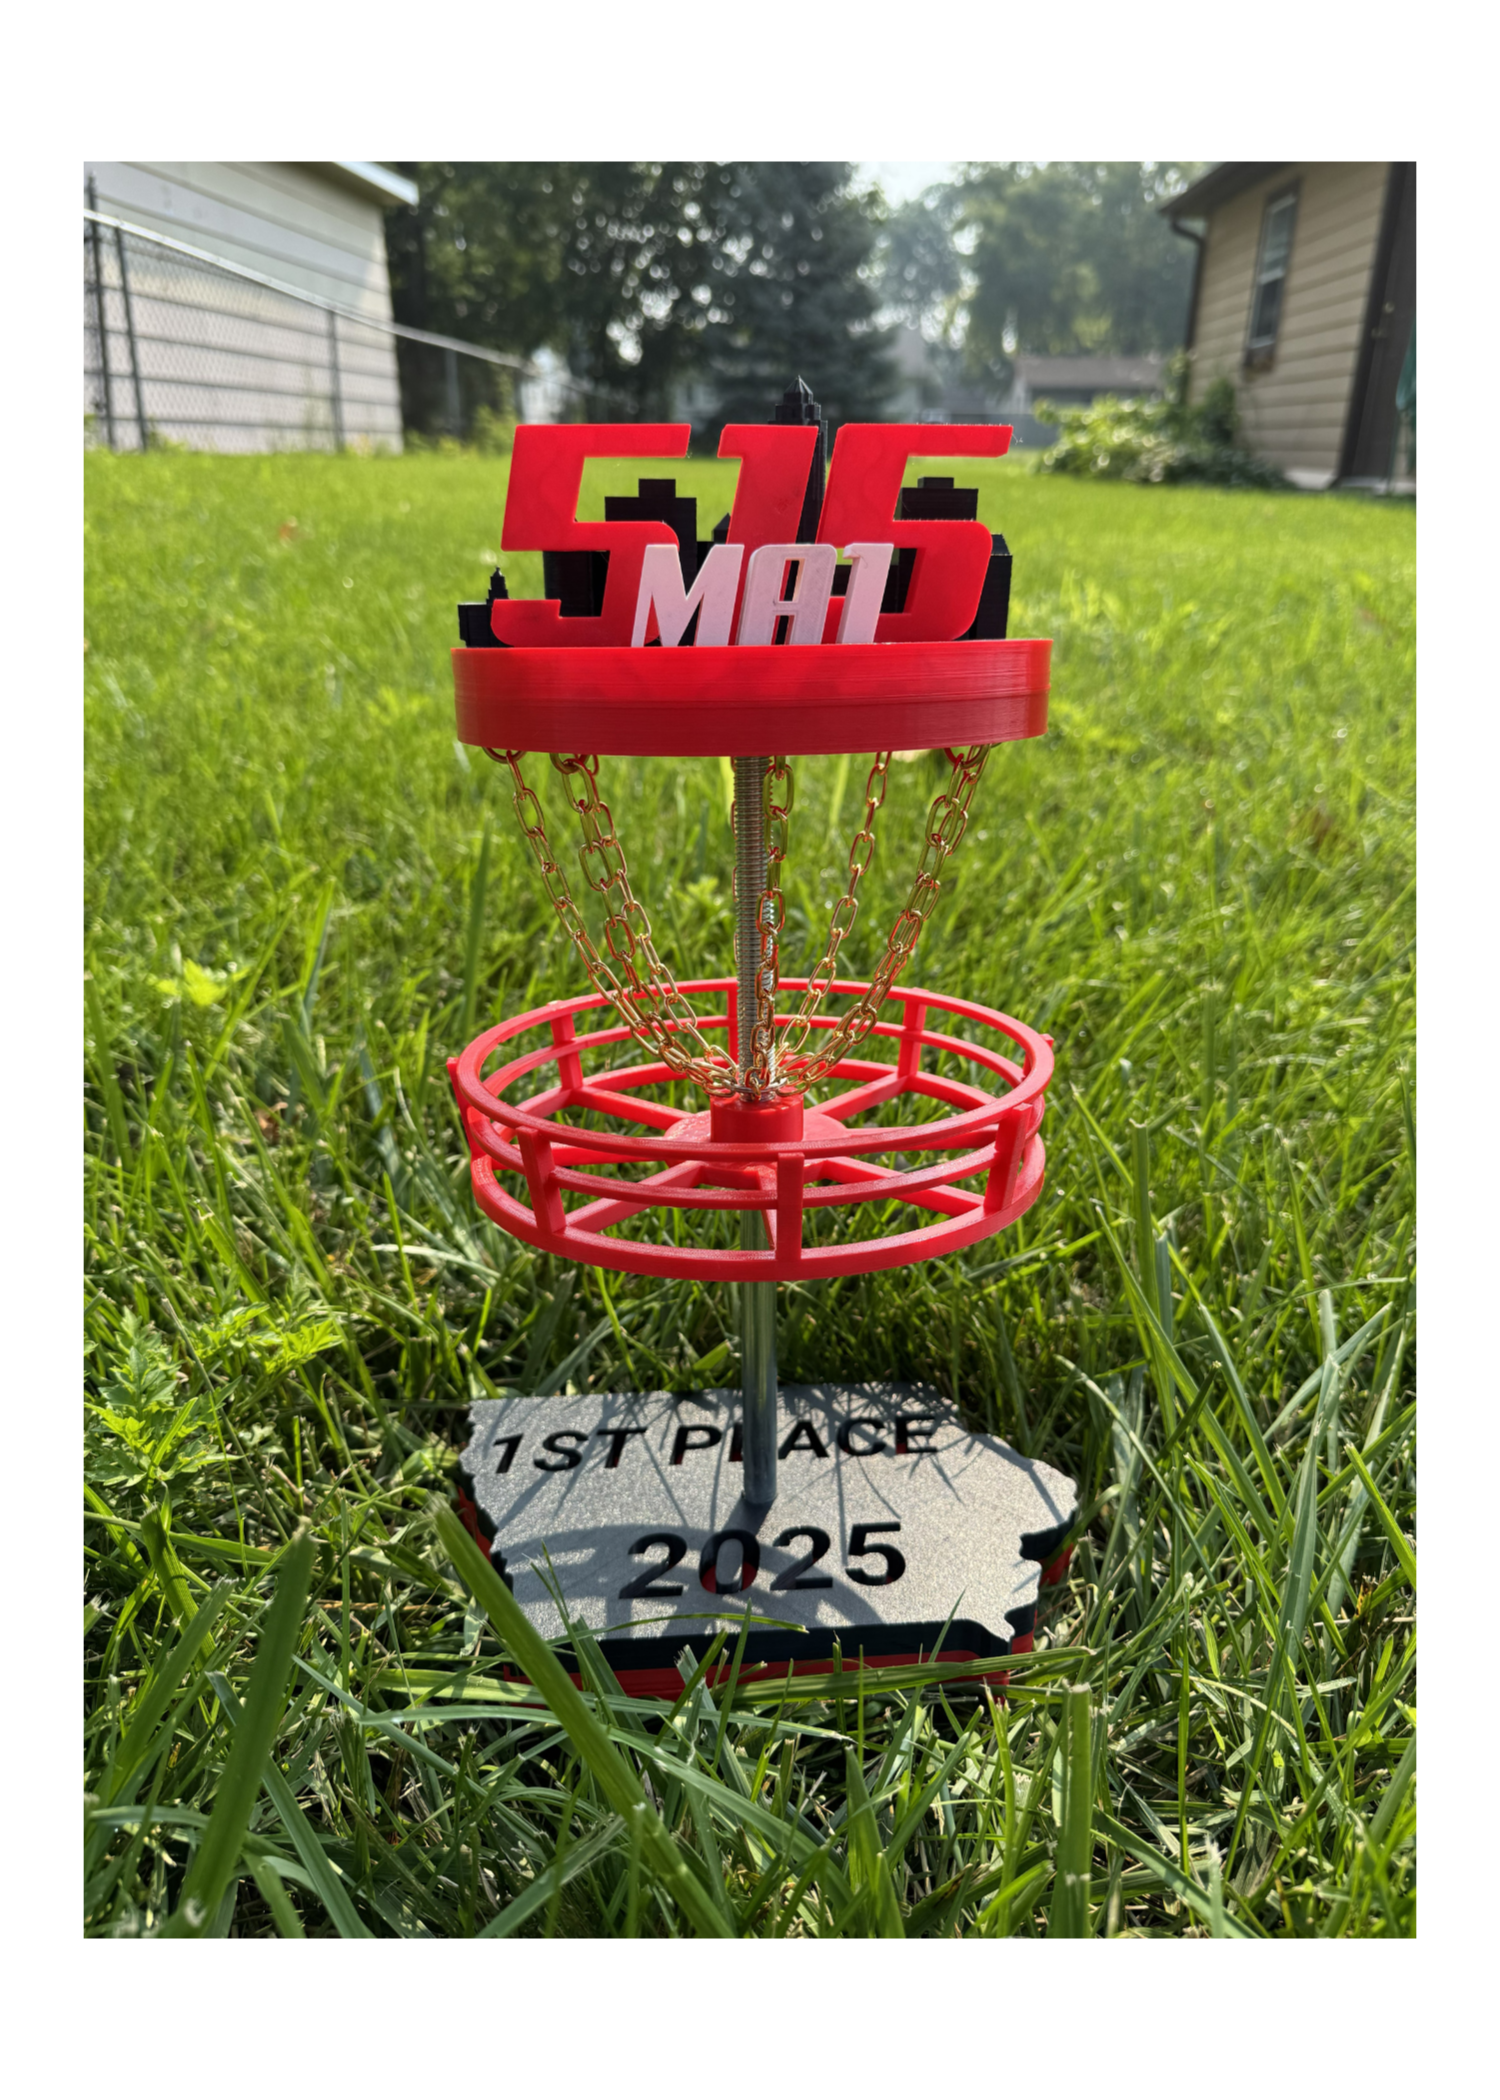
A client requested four disc golf trophies for league division winners. Creation involved numerous brainstorming sessions, continuous discussions, and intriguing design challenges.
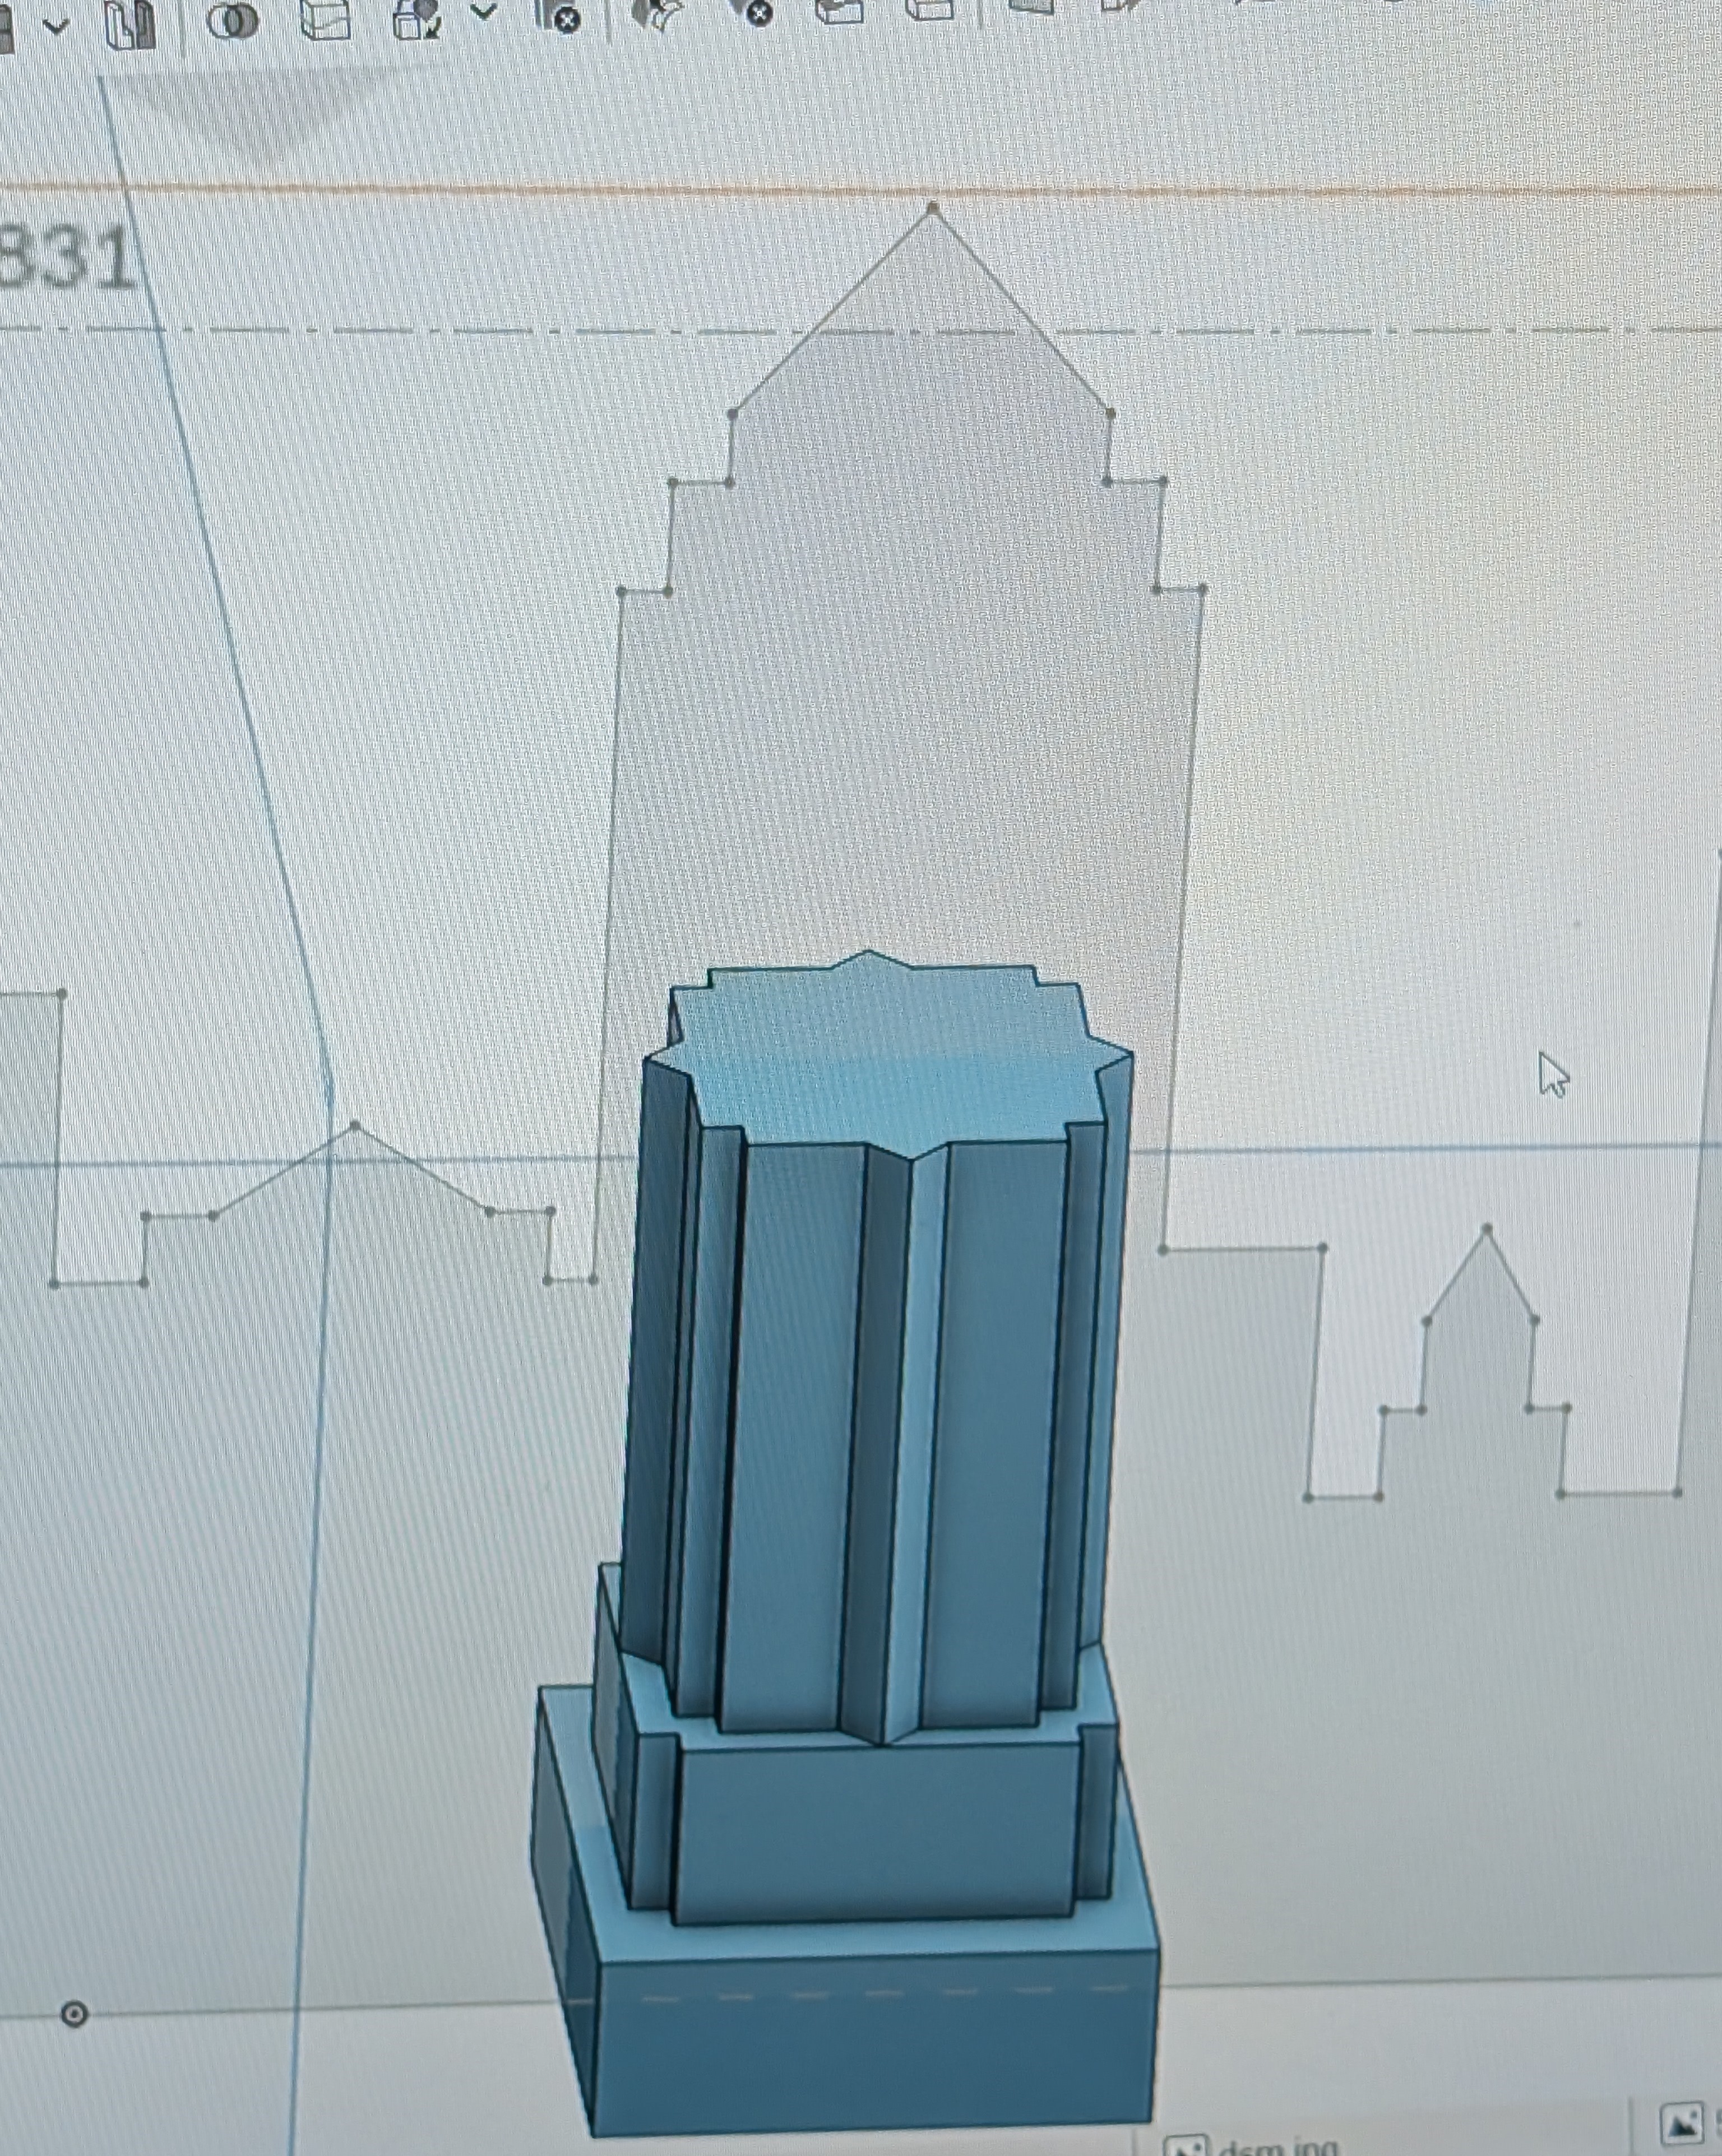
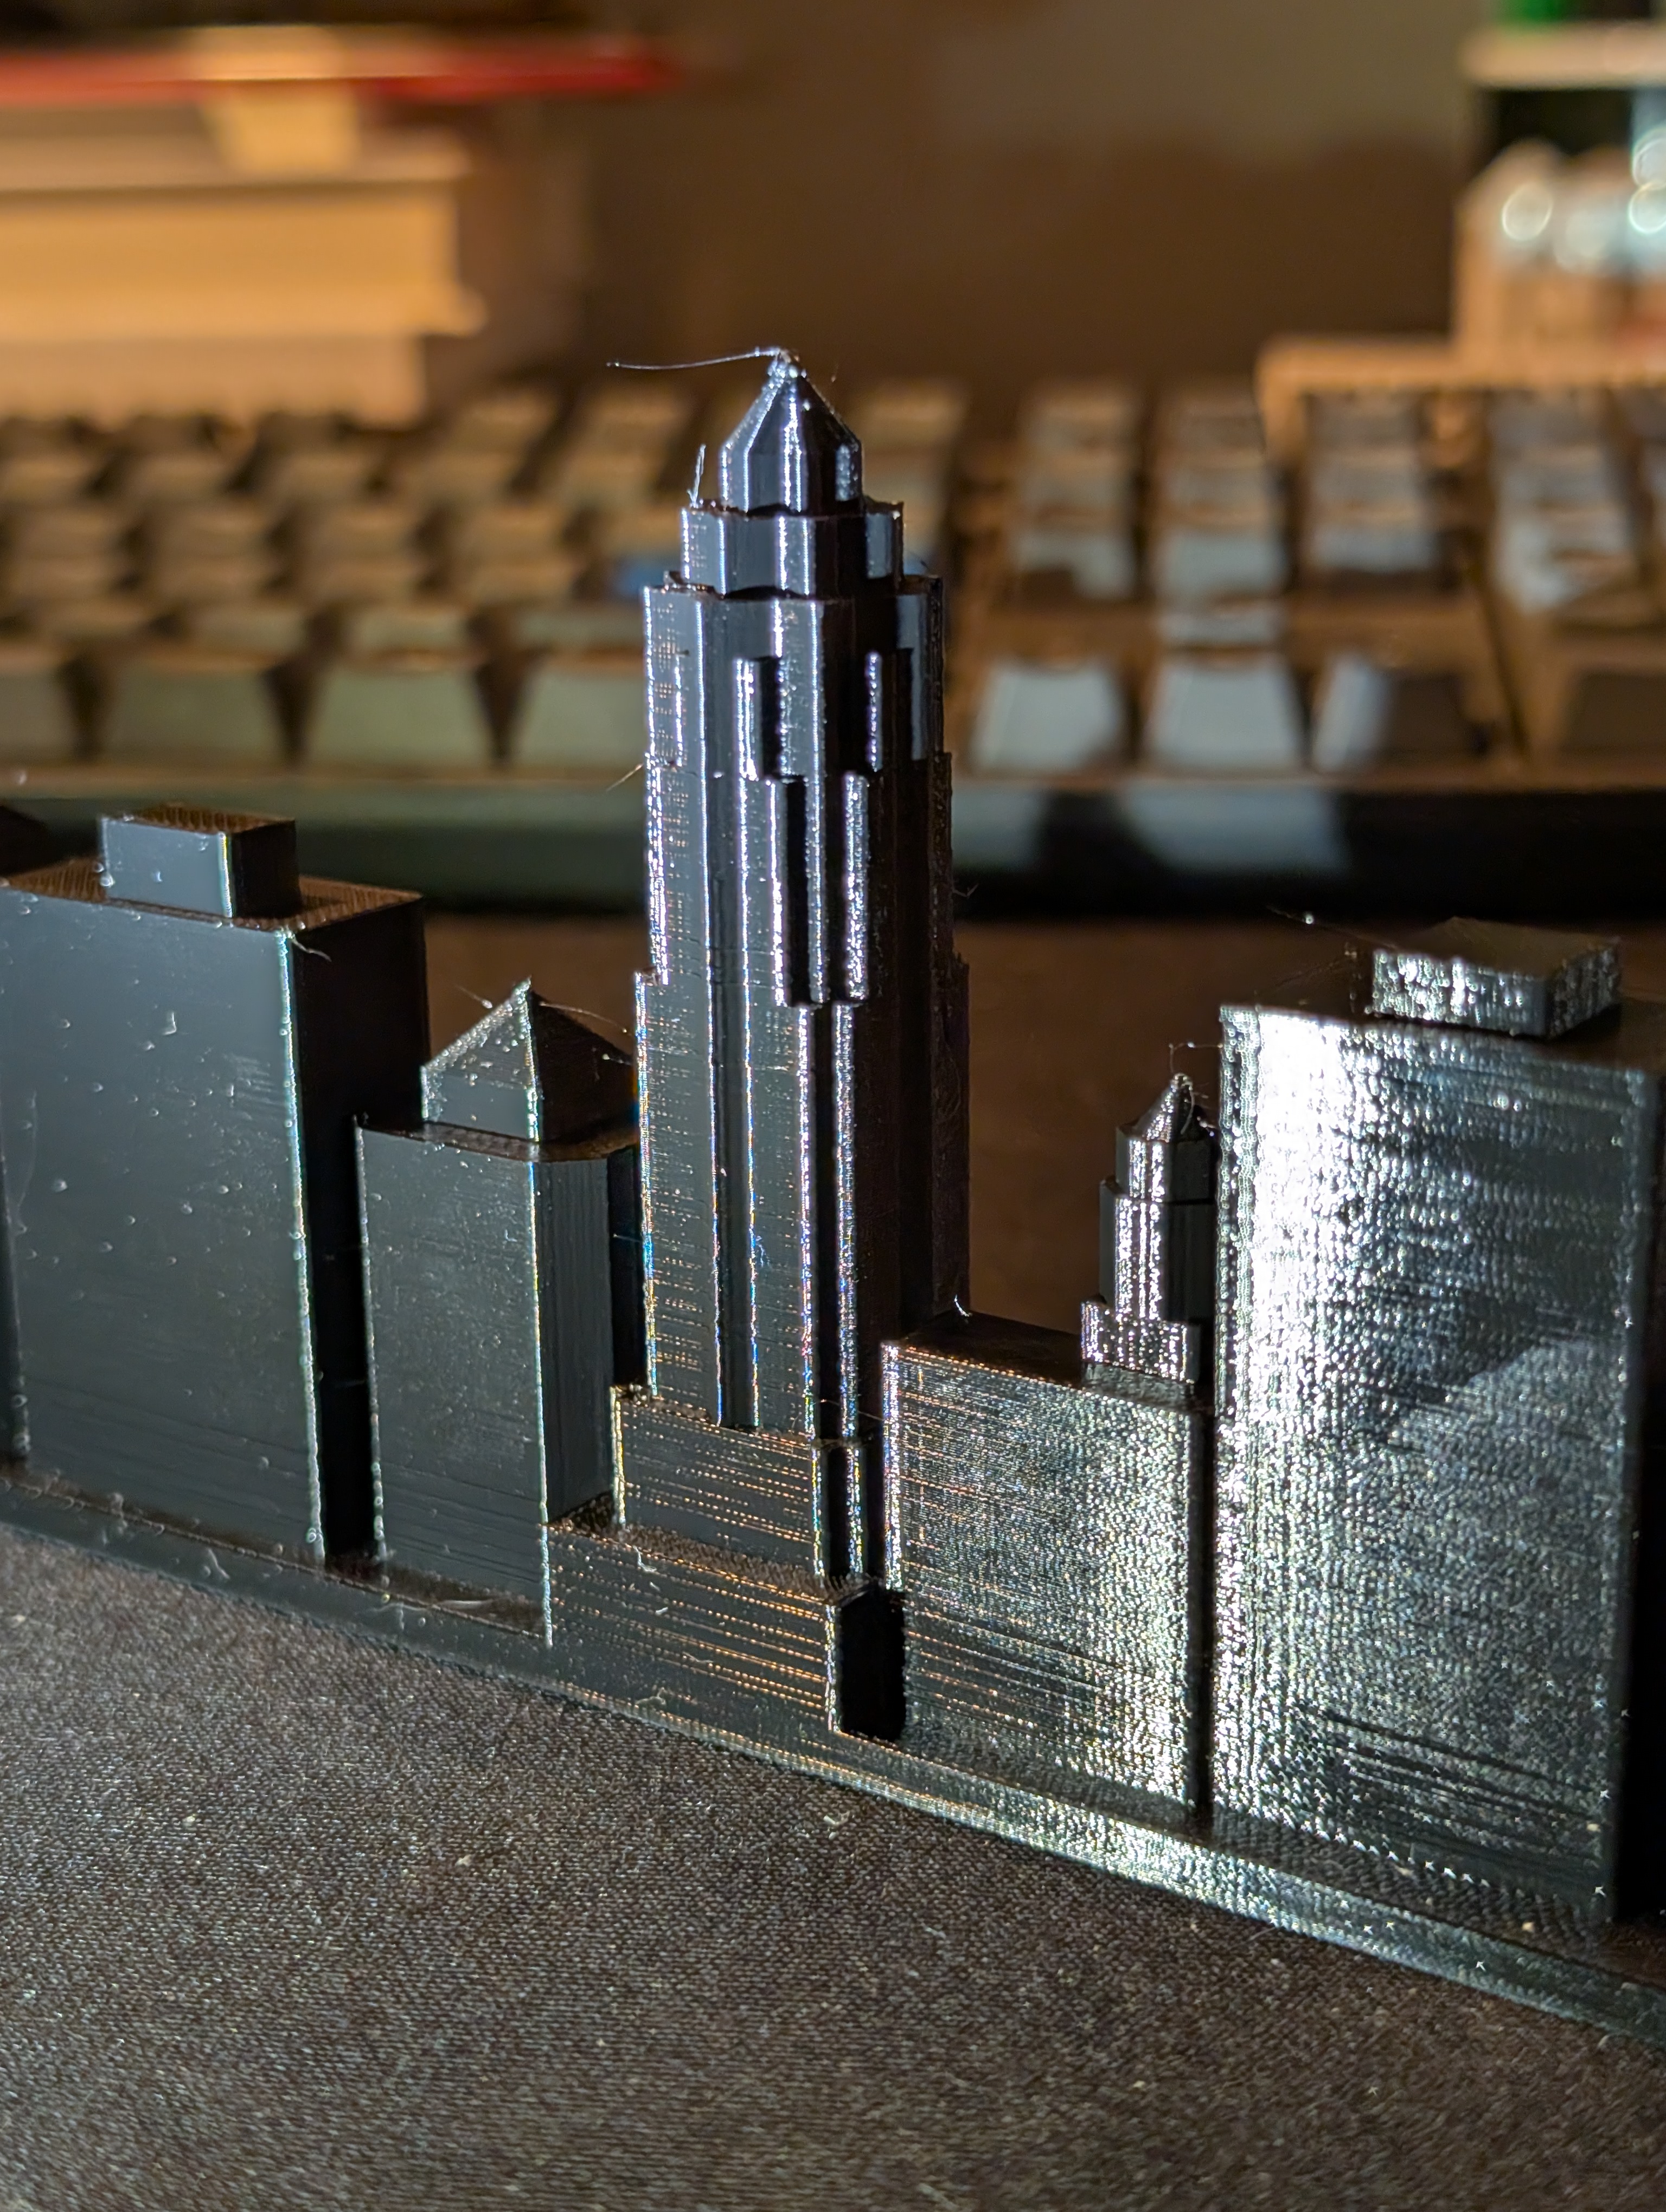
Based on the main logo of the league, the iconic Iowa building skyline was key. The design was meticulously recreated by hand to match. Main references for this were Google Earth with changing perspective. Doing custom work helped to elevate the entire design to another level and provided a lot of design experience.
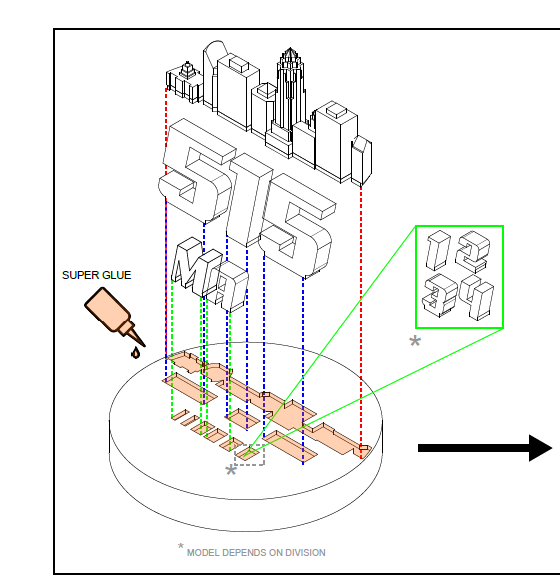
The text was next. Custom font was used for the logo and so the image was up-scaled and manually traced through the CAD program. This same technique was used for making the division text as well. The last element of the main logo was to incorporate disc golf.
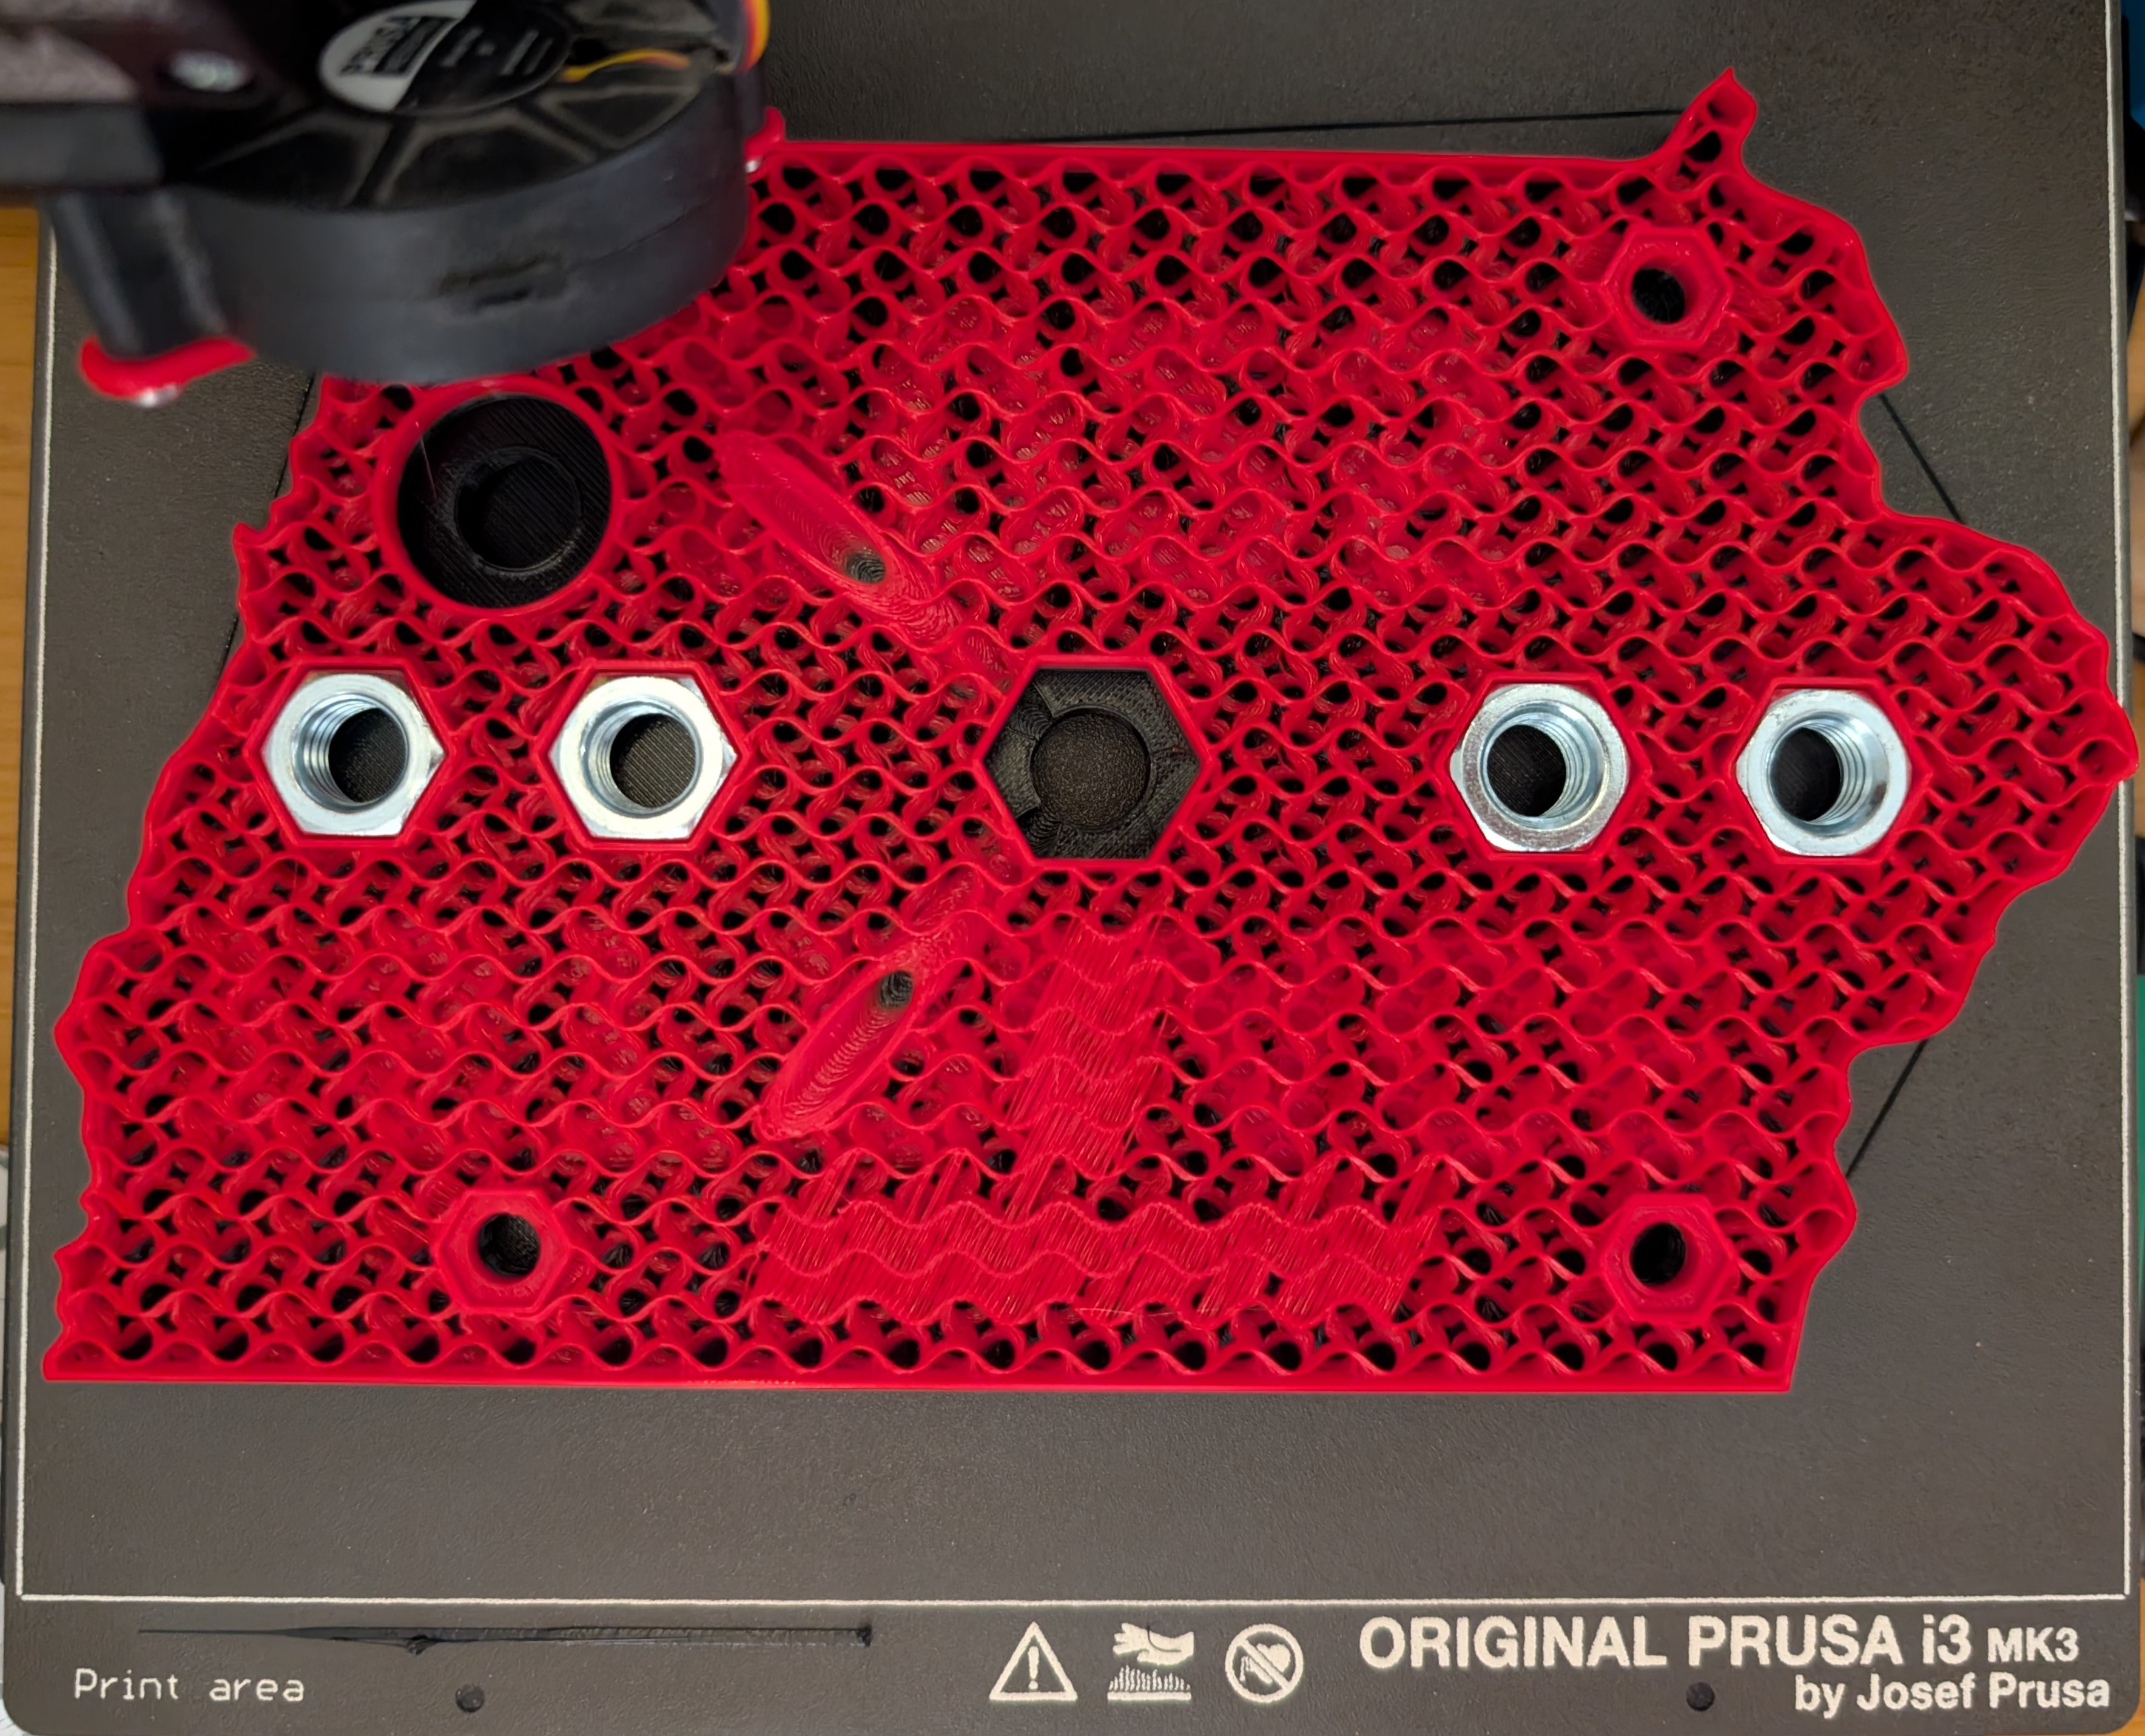
Early on in the brainstorming process it was decided to create a mini sized disc golf basket. All the rest of the elements were able to fit on the top portion while the base incorporated the state of Iowa. For sturdiness and weight, a large, partially threaded, rod was used as the main support. Numerous nuts were also embedded into the design for both functionality and to add addtional weight.
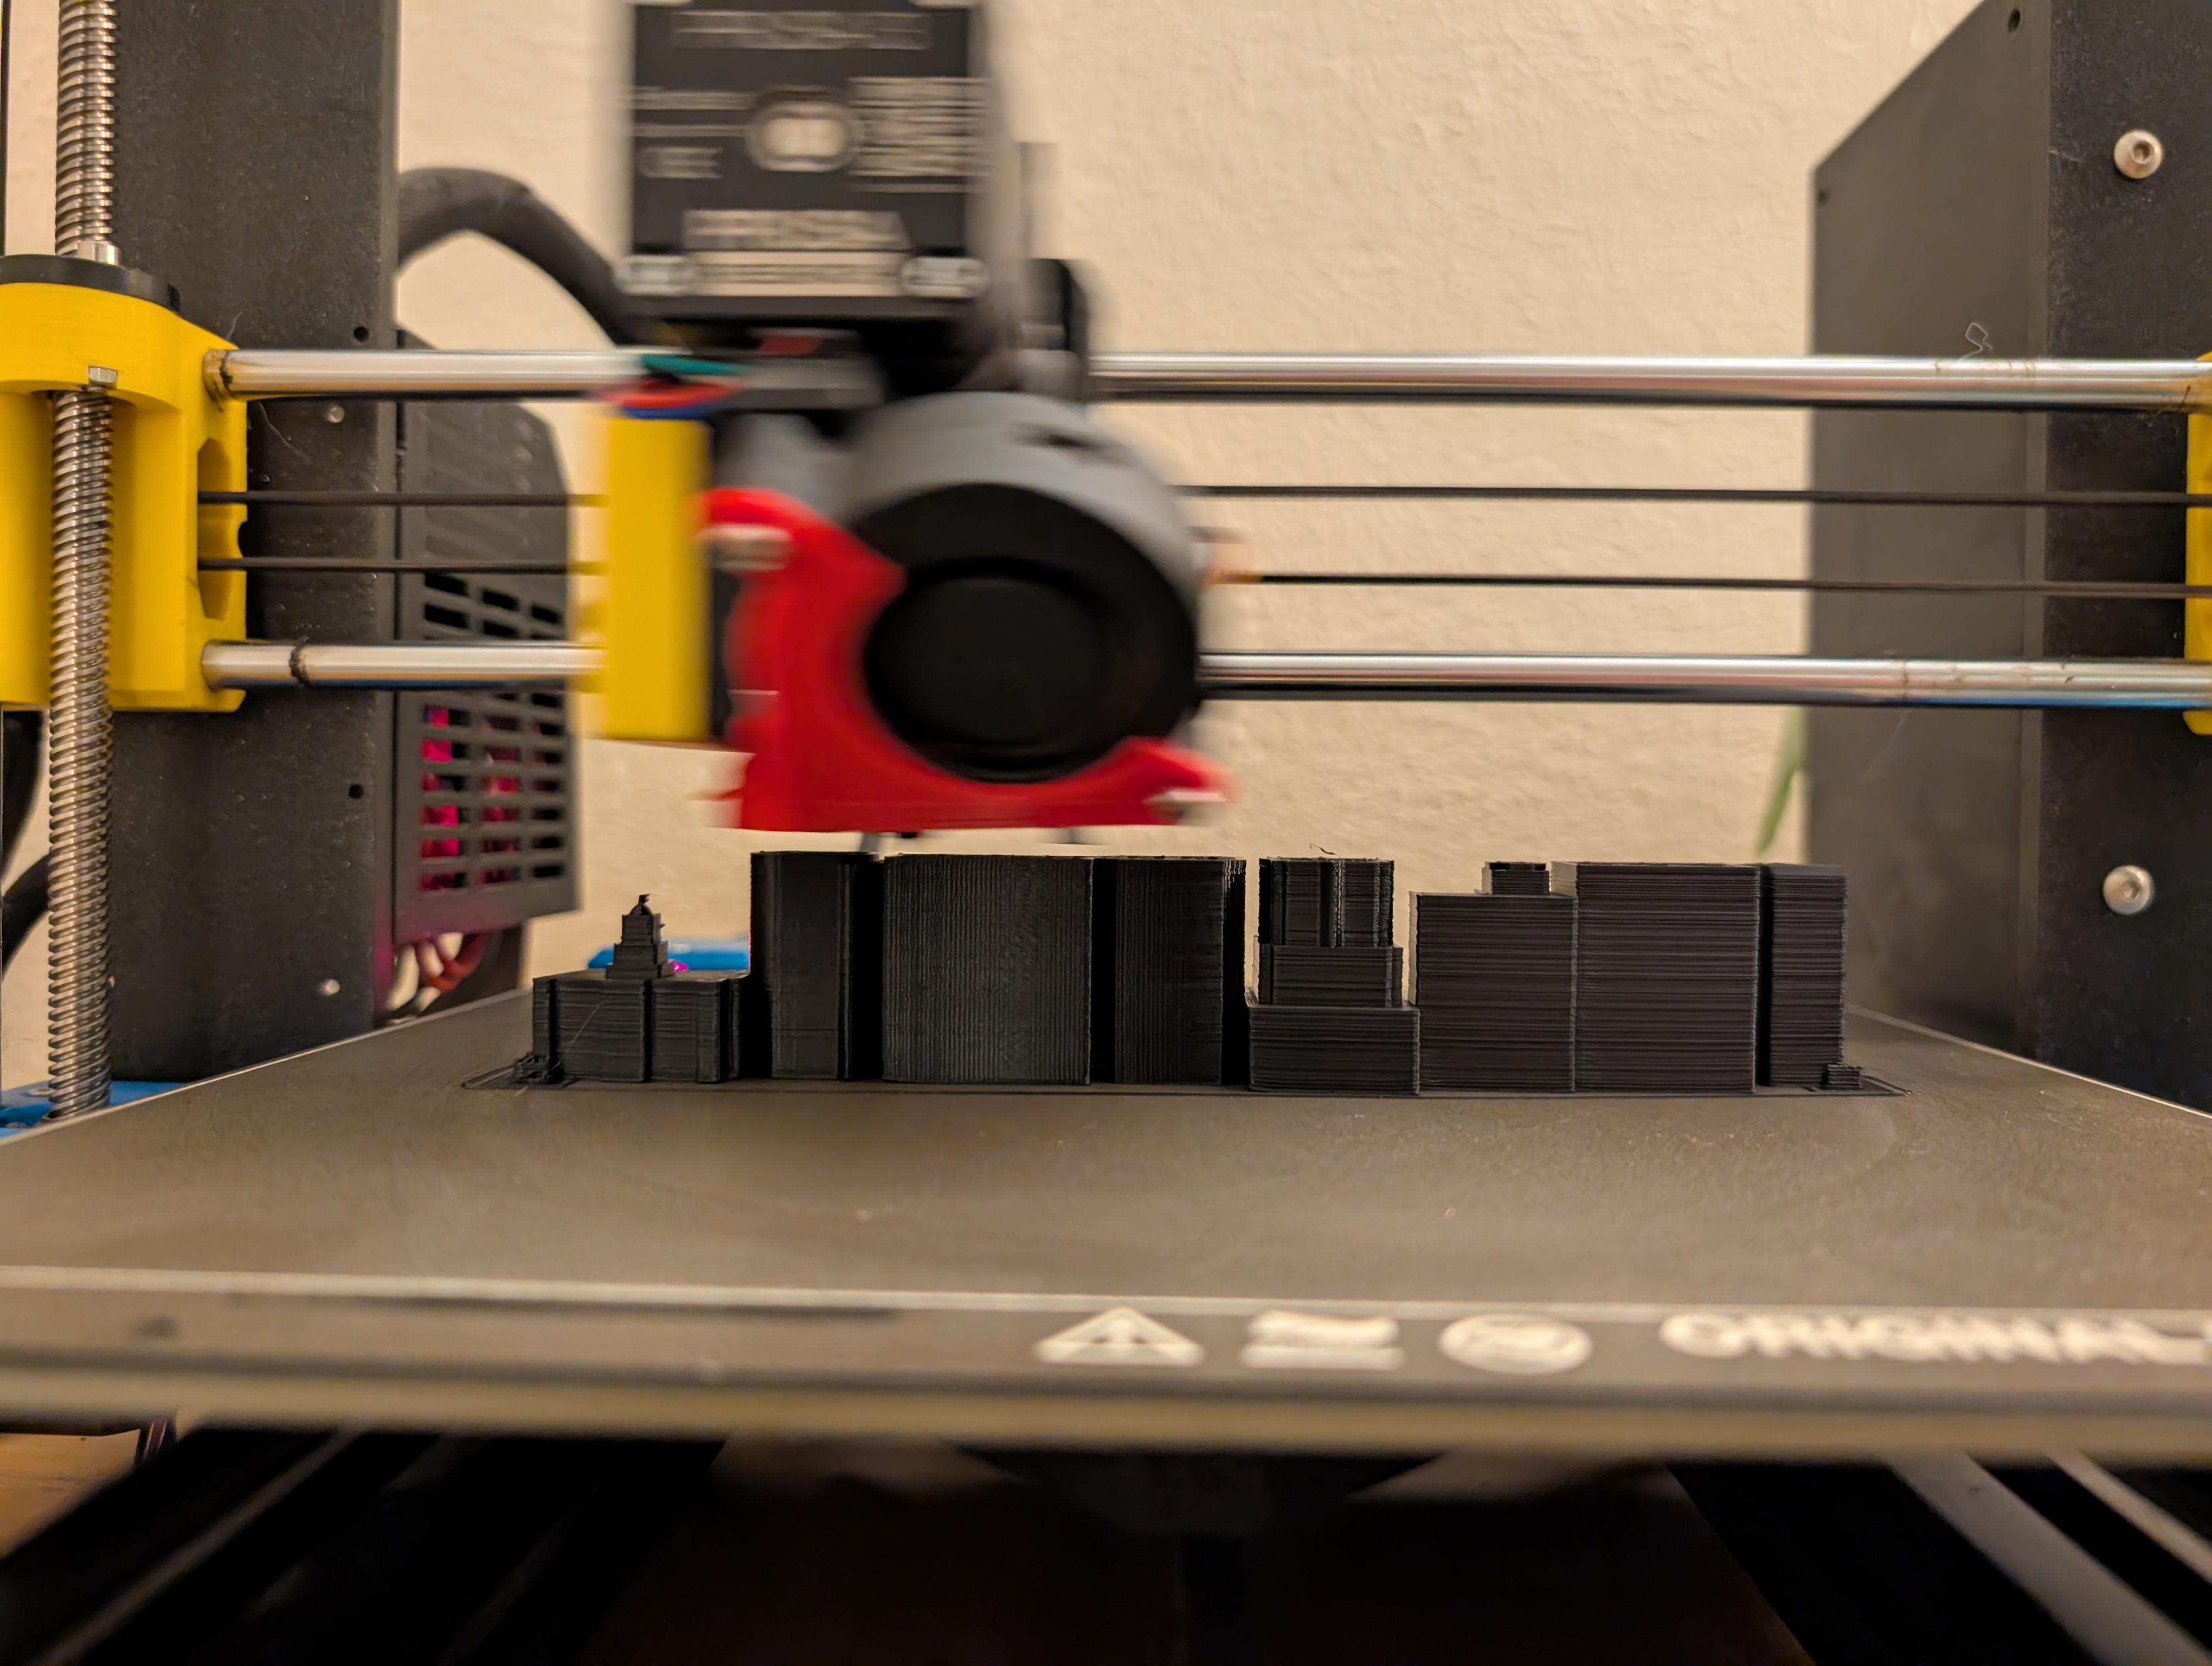
After running through the design and getting everything sorted in CAD, it was time to move onto physical prototyping. There were multiple iterations of each section in order to achieve acceptable standards. Various jigs and test pieces were manufactured to verify tolerances and fit - primarily on the embedded nuts, set screws, and washer locking mechanism.
These prototypes were printed on small scale and with lower fidelity compared to the final design to maintain an expediated timeline. They were also printed using excess filament from previous projects, ultimately driving down the cost for this specific project.
Throughout any project there will be snags and complications. Some notable items of concern came up surrounding strength of the structure, choosing the correct materials for non-3D printed parts, shipping, and assembly. Upon the first prototype of the basket, it was quickly discovered that the support structures were too thin. Multiple breakages occurred during assembly and shipping. Overcoming this involved increasing depth of the bands along with adjusting angles on the basket itself to be less steep and offer more of a 'shelf' for the bands to sit on.
Materials were another concern. The client and I spent hours in person searching around for the best chain material that would be a) sized correctly, b) the correct chain type, c) fit in with color scheme. Physical stores were consulted while ultimately finding the right fit online. The hooks for supporting these chains also required intensive searching for the same criteria. These were eventually spotted in a local hardware store.
Shipping and client assembly were other barriers that were fairly new on my end. Most other projects have been for local or hand-delivered items. With these four trophies being shipped, the design process had to take this into account. Preventing large items in the design and a more modular build saved on space and ultimately shipping cost. There was a balance between added weight and cost as well.
Complications hone skills and allow avenues for creativity. They are ever present and will be tackled with vigor on any project.
An extremely rewarding process in this design was creating an installation manual. Due to past professional work experience, I've been exposed to a wide variety of installation manuals and guides. Luckily, this came in handy when creating an installation/assembly guide for these trophies.
Inspiration was mainly gathered through Ikea and Axis guides. Their simple, image-driven, guides are some of my favorite. There is a specific art to being able to describe processes purely through visual form. With this basis, the installation manual was created through Bluebeam and sent to each winner as well as the client. Documentation is a very important, albeit laborious, step in projects.
Communication throughout the entire process was key. The client and I talked frequently and made sure to discuss each major design decision to make sure the project kept on track.
Once all items were shipped along with the guide, lines of communication were kept open to ensure any questions could be answered swiftly. After this project was completed and the final trophies were handed out, follow-up messages were sent to make sure that client and winners were satisfied with quality. All recipients were also directed to reach out if there were any concerns.
Ultimately, the key takaways from this project were:
As with all 3D projects, the final assembly of all the parts were finalized in CAD and sent to the CAM software for slicing. The corresponding gcode was sent to the 3D printer for final creation.
There were numerous stops put into the code for filament color change and to insert embedded nuts on the base, basket, and top.
Interact with the model on the right to understand the full model design and see image gallery below for more pictures.
All four trophies in a row
Embedded nuts and channels for set screws show in this cross-section.

How many parts were created?
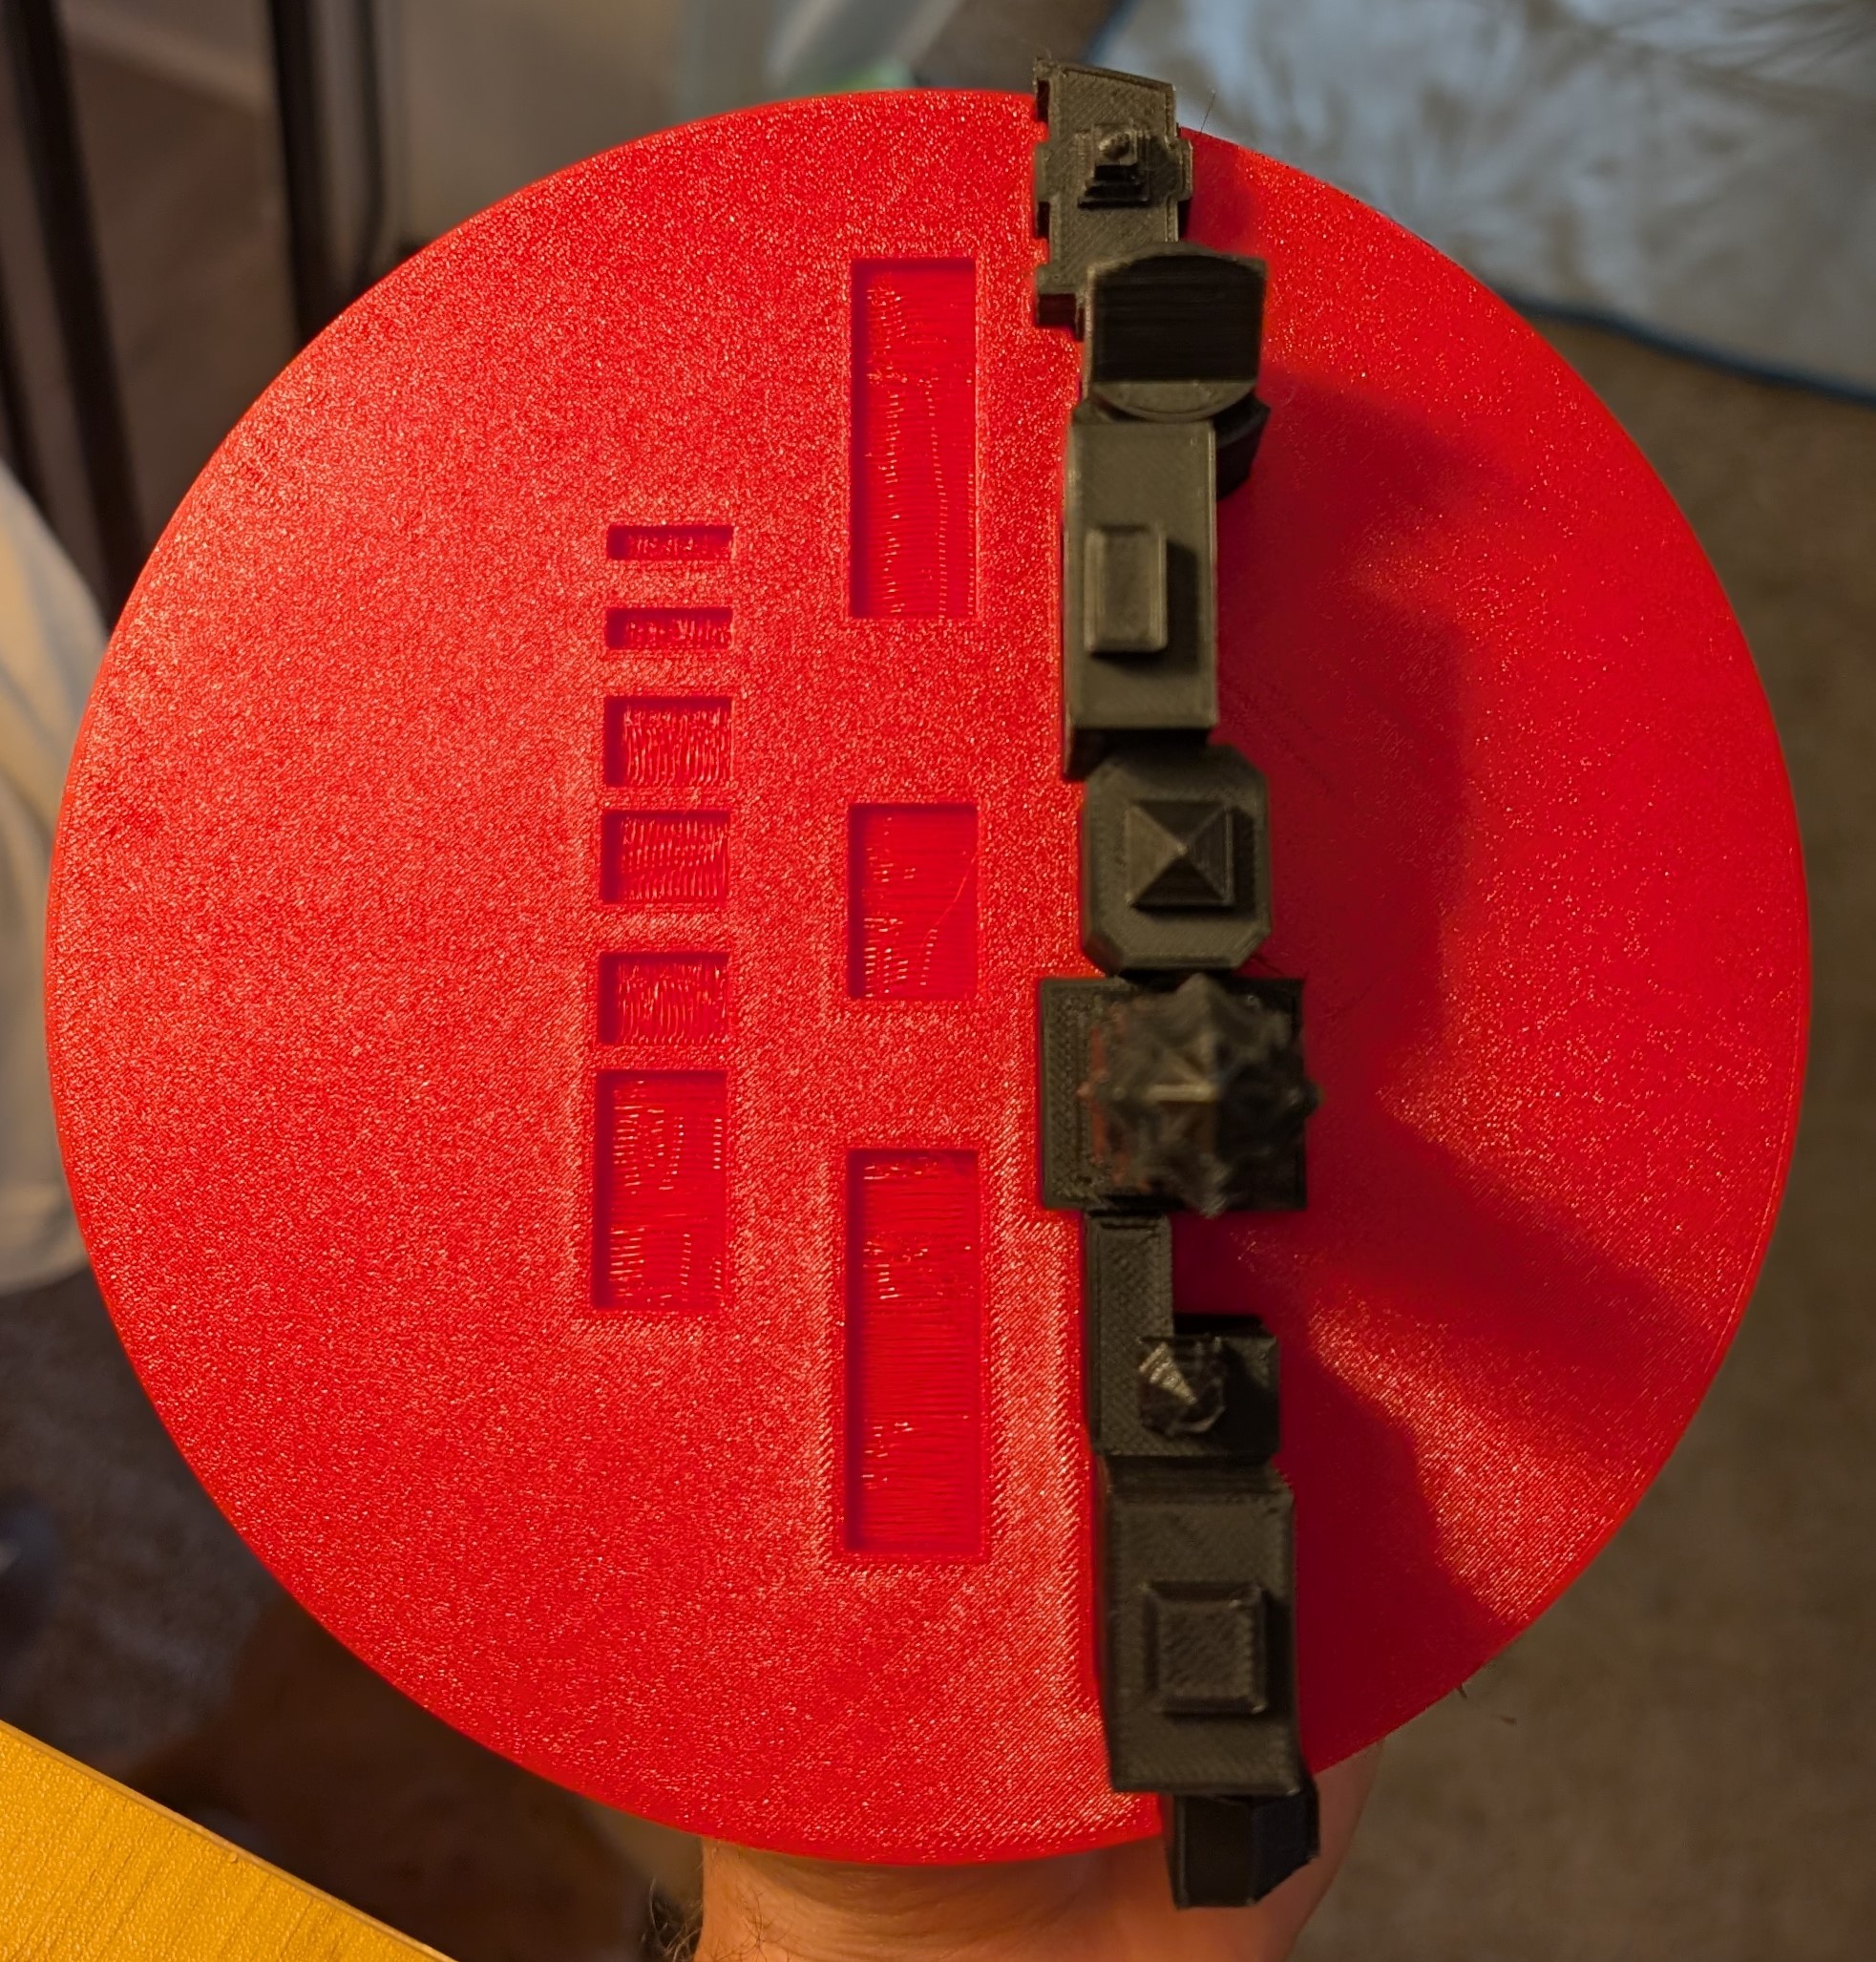
Showing the cutouts for assembly.
View the top from the bottom.
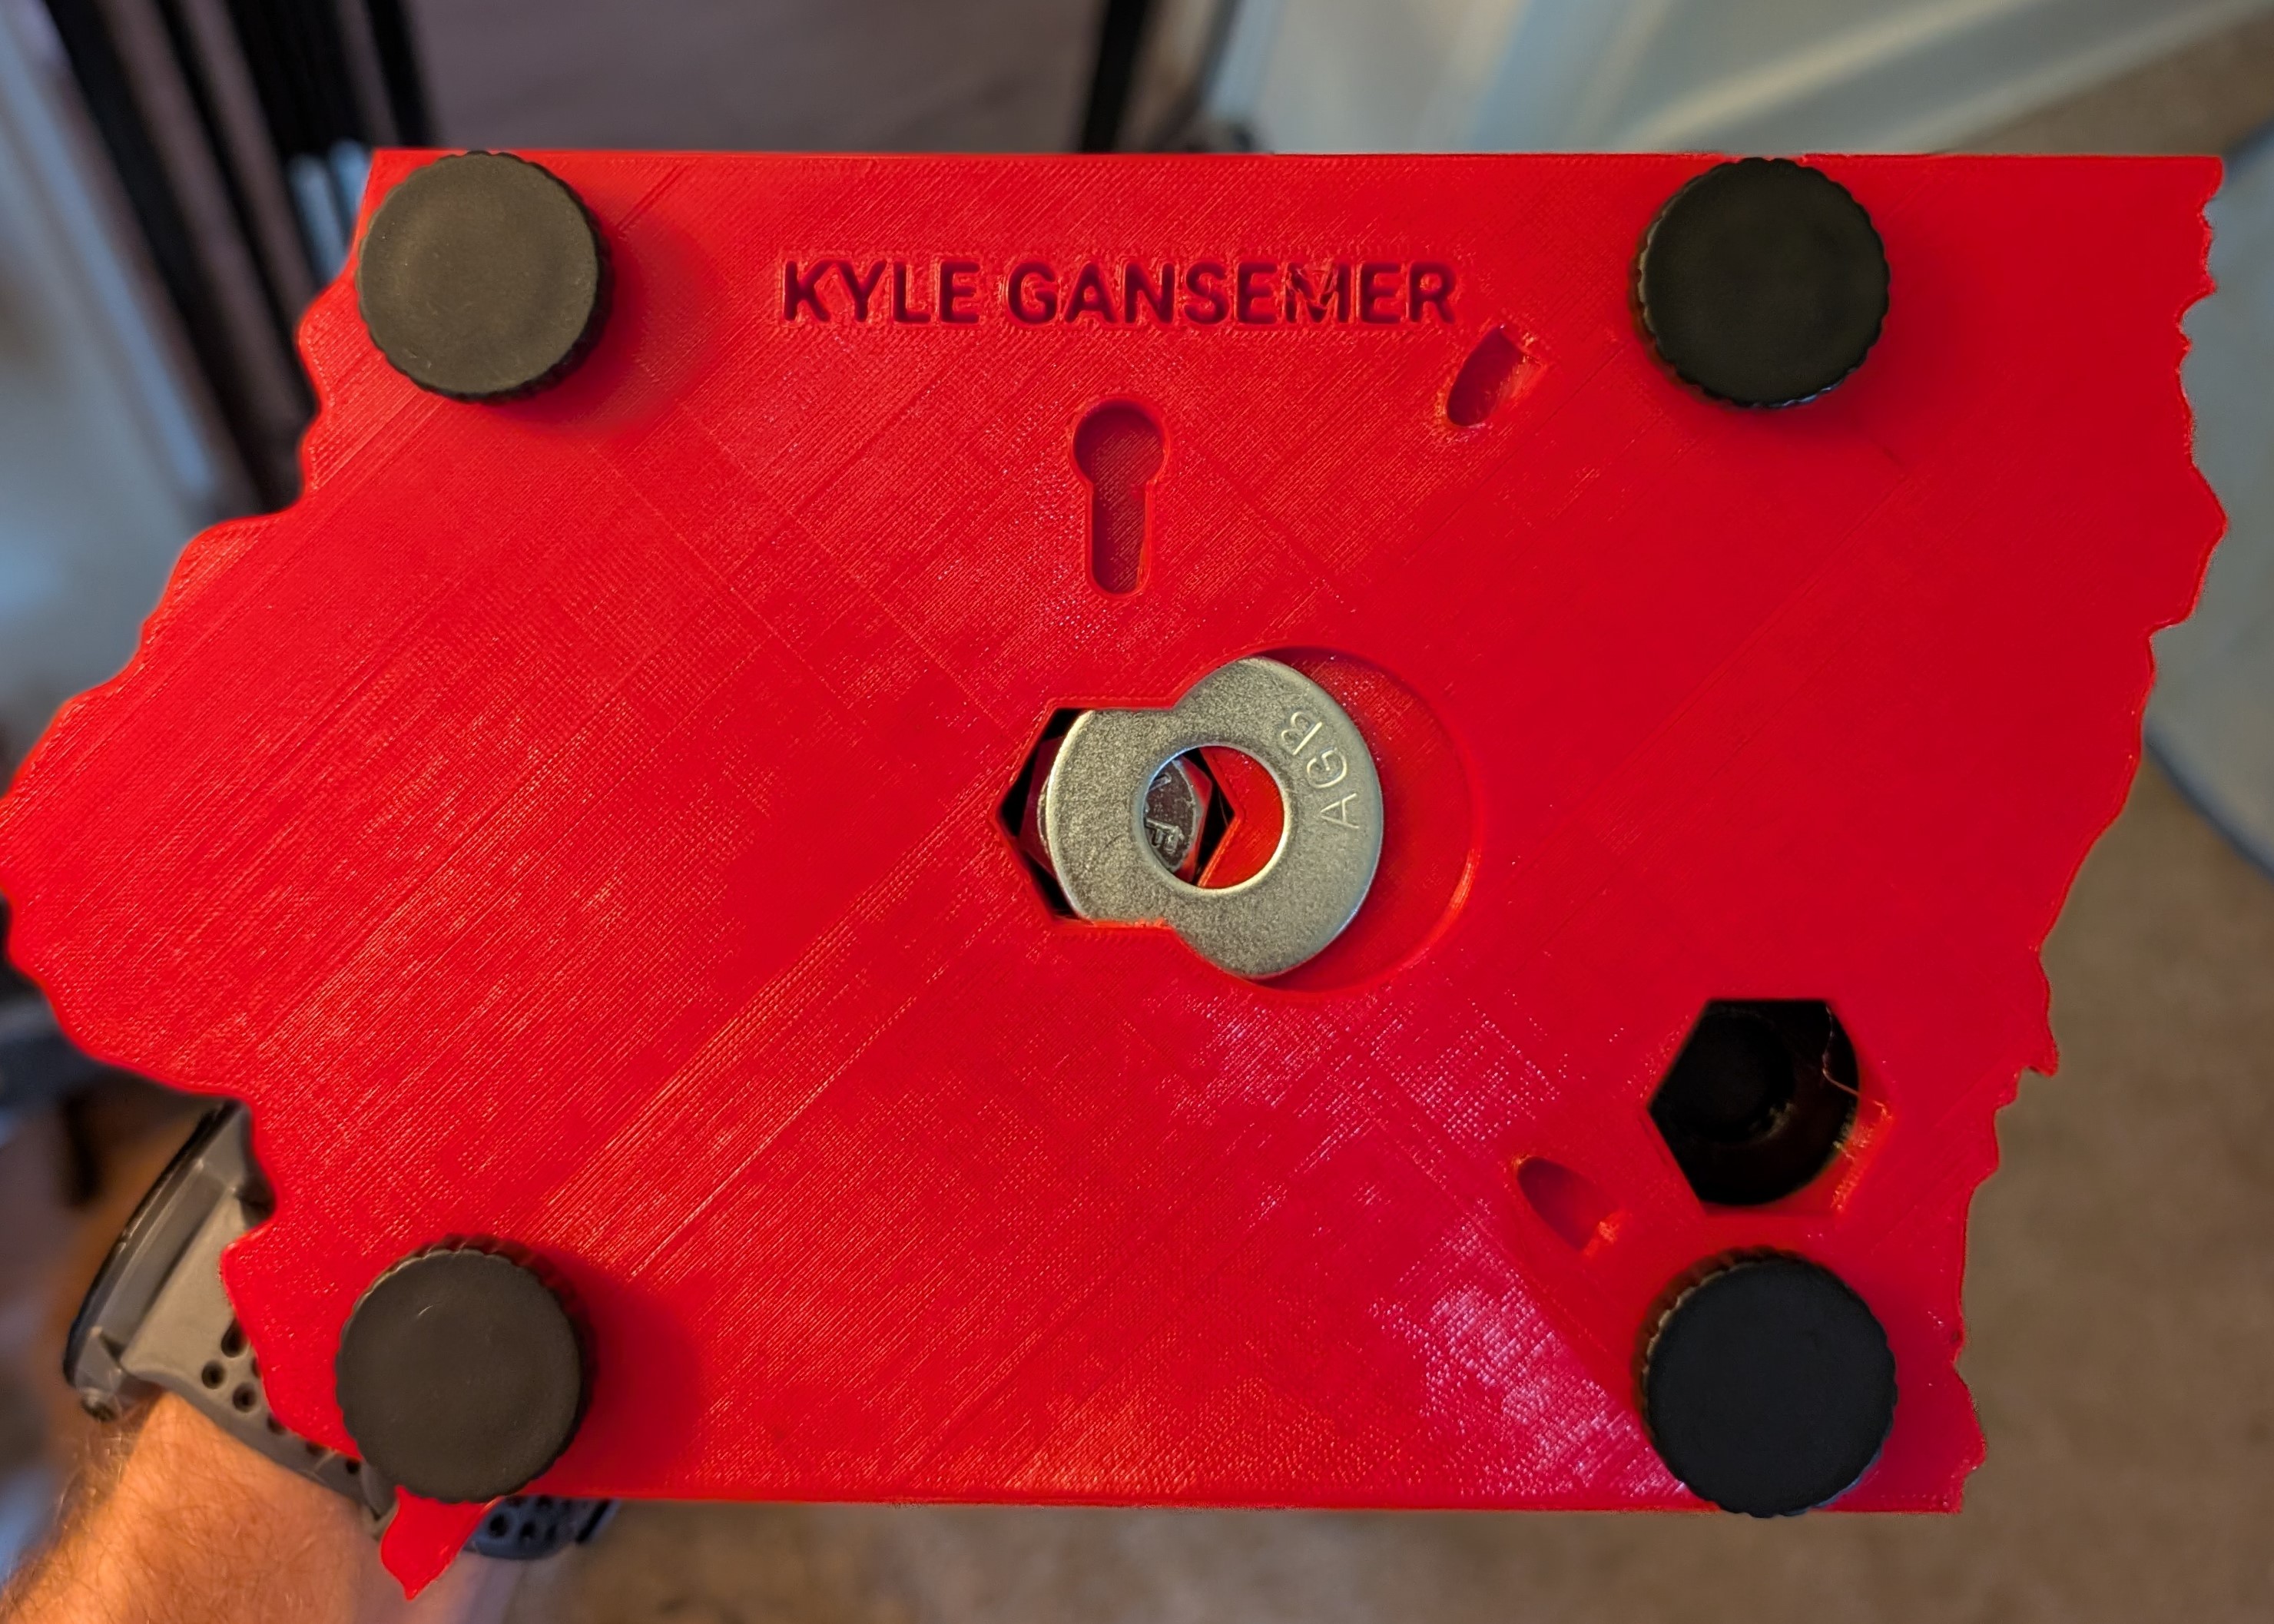
Including leveling legs, washer holder, and blocking insert. Two channels lead to set screws for aligning pole.
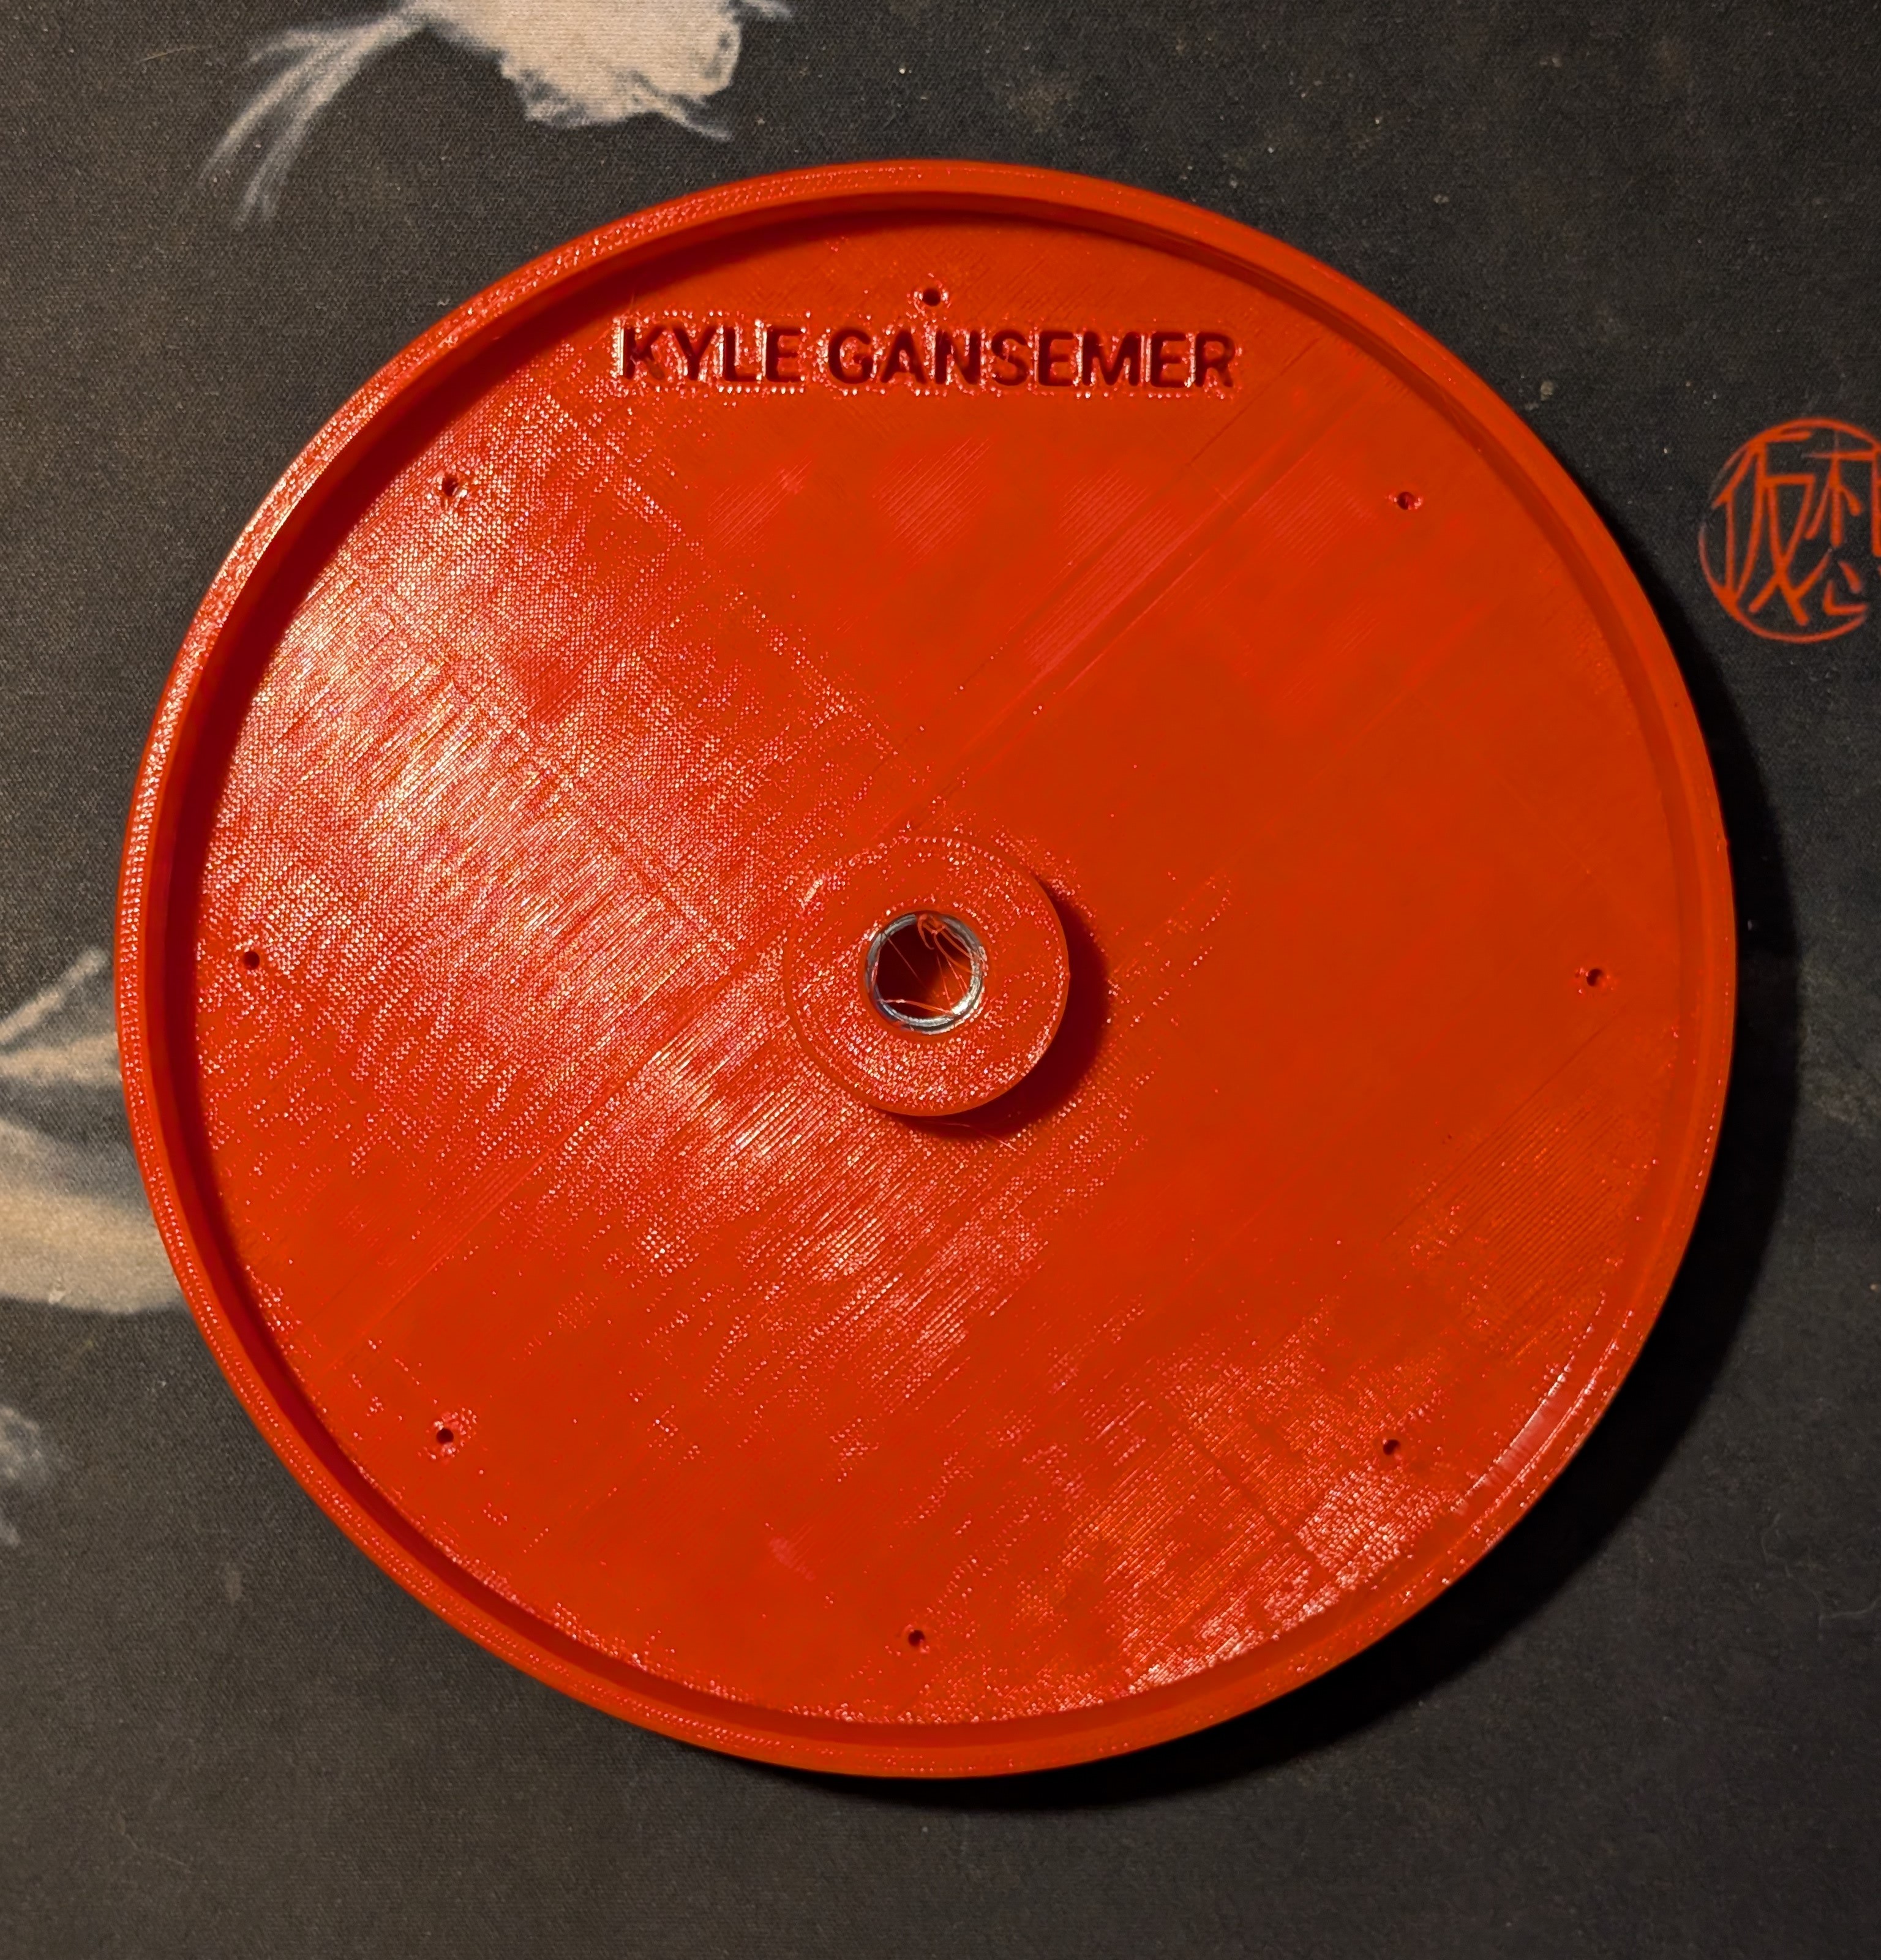
Holes for hook installation.
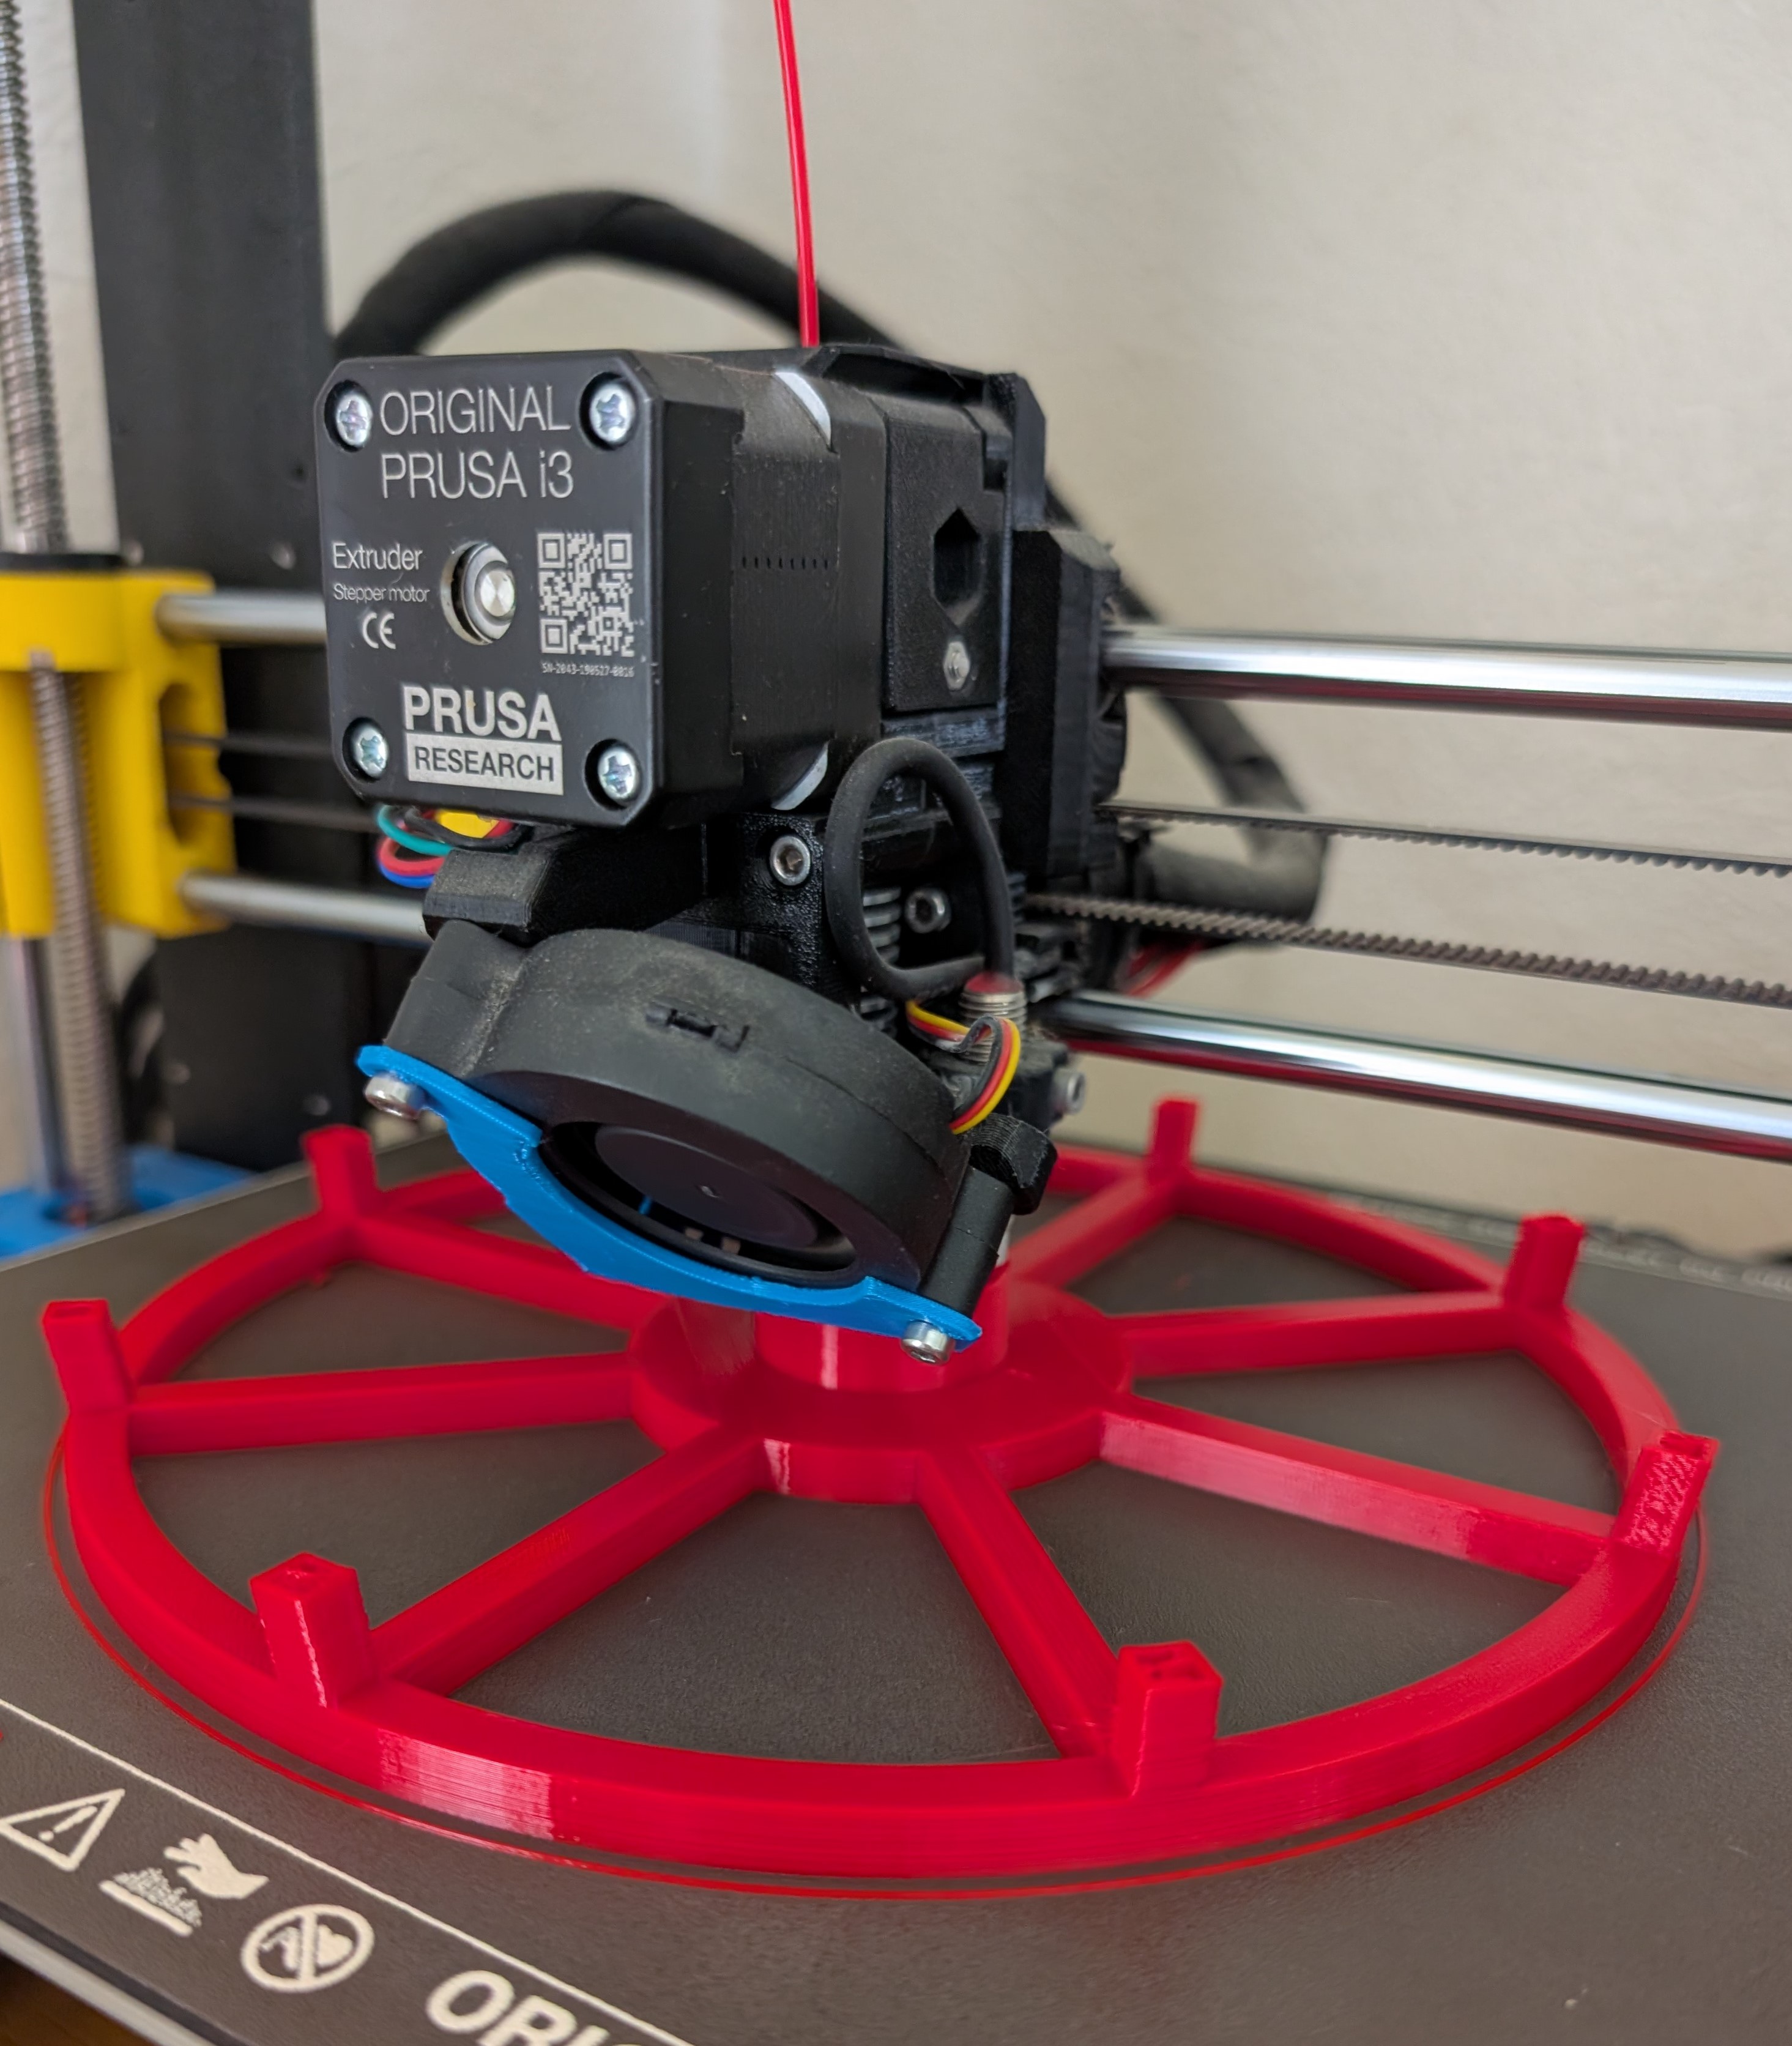
Midprint on the basket.